Common email signatures
When members set up their email signatures, you can require them to use the common signature template registered by the administrator.
The administrator can create up to 5 common signature templates.
Add common signatures
Add a new common signature.
Templates with common signatures that have been added are automatically enabled, and you can also set that template not to be displayed to members.
PC Web
- In the left menu of Admin, select 'Service' to expand the menu, then click 'Mail' to go to 'Mail'.
- Select 'Signature'.
- Click 'Add common signature'.
- From the common signatures list, check 'Disabled' for the template you do not want to use as a common signature template.
In the member signature creation window, the basic information entered in the member information is linked and displayed. - Select how to apply 'Block images/links from external emails'.
- Signature name: Enter the name of the template you are adding. (Maximum of 10 characters)
- style: Depending on the style, you can choose from default, card, horizontal, and free. If you have a webmail signature that has already been created, you can copy the HTML code of that signature and paste it into a freeform editor (HTML mode) to use.
- Name: Names entered in multiple languages can be displayed in the signature.
- Company address: Enter the company address in which members include in the signature. (Maximum of 10)
- Additional comment: You can enter the text to display at the bottom of the signature template. (Company's slogan, etc.)
- Logo image: You can add logo images to your signature template by uploading the file or entering the image URL. (Excluding the free style)
- File uploads are limited to 1000px width and 700px height. If the logo image is in GIF format, enter the image URL.
- If the image size exceeds the file limit, you can use an image editor to customize the image size.
- When uploading files, the image size may be adjusted. If the adjusted size exceeds 500 KB, it cannot be uploaded.
- You can upload up to 10 common images per domain, and you can insert up to 5 images per signature.
- The logo image can be accessed by anyone, so please be sure to exclude personal or sensitive information.
- QR code: Members who have the permission to connect with external users can include a link or QR code in the signature; this helps the email recipient to add the member as a contact easily.
- Copy: Copy the HTML code of the template created in the clipboard.
- Preview: After editing, press 'Preview' to immediately check the edited contents.
- Press 'Save' at the bottom to add the template to the common signature list.
Enable or disable common signature
After uploading a common signature, you can choose whether to provide the common signature templates to corresponding members.
PC Web
- In the left menu of Admin, select 'Service' to expand the menu, then click 'Mail' to go to 'Mail'.
- Select 'Signature'.
- Turn the toggle button right to the common signature template on or off from 'Common Signature' to allow usage.
- Click 'Save' at the top to save the file.
Edit common signatures
Edit the created common signature templates.
PC Web
- In the left menu of Admin, select 'Service' to expand the menu, then click 'Mail' to go to 'Mail'.
- Select 'Signature'.
- In the 'Common Signature' list, press 'Edit' right to the signature template and edit the contents from the 'Edit signature' window.
Delete common signatures
Delete a common signature template.
PC Web
- In the left menu of Admin, select 'Service' to expand the menu, then click 'Mail' to go to 'Mail'.
- Select 'Signature'.
- In the 'Common Signature' list, press 'Delete' right to the signature template to complete.
Footers
You can add a fixed message at the bottom of your emails, such as the company slogan or regulations, to be used as a footer.
When the footer is set to use, all emails sent by members have footer texts included at the bottom of the email content.
The footer is not displayed on the compose window and can be viewed in 'Preview' or the sent mailbox after sending an email.
You can designate different footers based on security level and where emails are sent. Also, you can set up a footer to include each time you send a new email, reply, forward, or resend emails.
If the footer is set differently for internal/external emails and the recipient includes both internal/external email addresses, 2 footers are displayed in the sent mailbox.
However, the recipient can only view one footer set for internal or external email.
Add or edit footer
Add or edit the contents of a footer that will be included when sending an email.
You can enter up to 10,000 bytes for the footer content.
PC Web
- In the left menu of Admin, select 'Service' to expand the menu, then click 'Mail' to go to 'Mail'.
- Select the 'Signature' tab.
- Click
 at the right of the Footer section.
 - Enable 'Enable footer', and change the settings on 'Application type' and 'Sending mail type'.
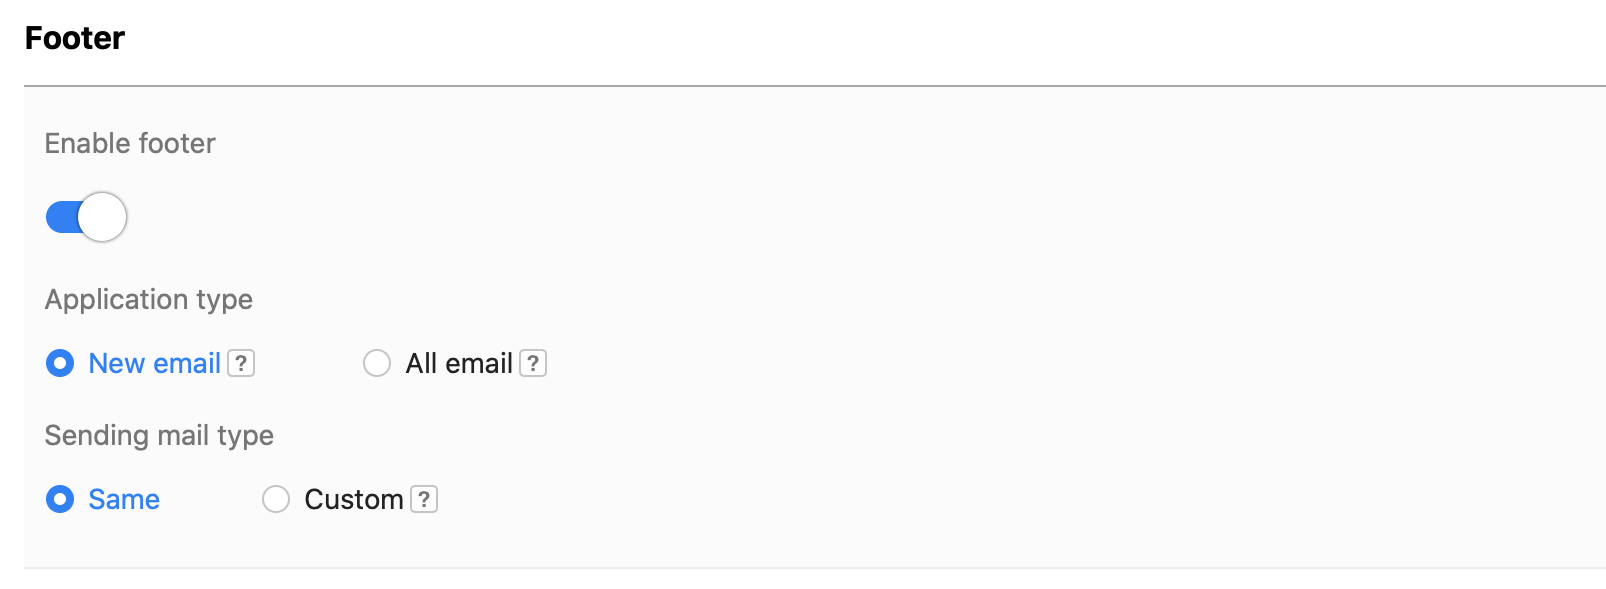
- Application type
- New email: Footer is only applied to new emails
- All email: Footer is applied to all emails (new, reply, forward, reply all, resend)
- Sending mail type
- Same: All emails have the same footer
- Custom: Emails have different footers depending on the security level or where the email is sent to (The name of a security level set in 'Security > Mail Security' will apply the same for the 'Sending mail type' category)
- Application type
- Click 'Add footer' to access the 'Add footer' window. Enter the footer name and content. Images can be inserted as URLs. If you want to edit a footer that has already been added, click 'Edit' in the 'Manage' field right to the footer list.
- Press 'Preview' to see how the footer appears.
- Press 'Save' at the bottom to apply the new footer content.
- Click 'Save' at the top right of the page to apply changes.
Footer use status
You can set whether to use the uploaded footer.
PC Web
- In the left menu of Admin, select 'Service' to expand the menu, then click 'Mail' to go to 'Mail'.
- Select the 'Signature' tab.
- If you enable 'Enable footer', you can add footers and set whether to use each one added.
- At the top right of the page, press 'Save' to complete.