You can set allocation amount in your budget and allocate it monthly. You can also set the carryover status of monthly balance and control status when the allocated amount is used. You can view the allocation status of the budget, and view the change history of budget allocation.
Manage
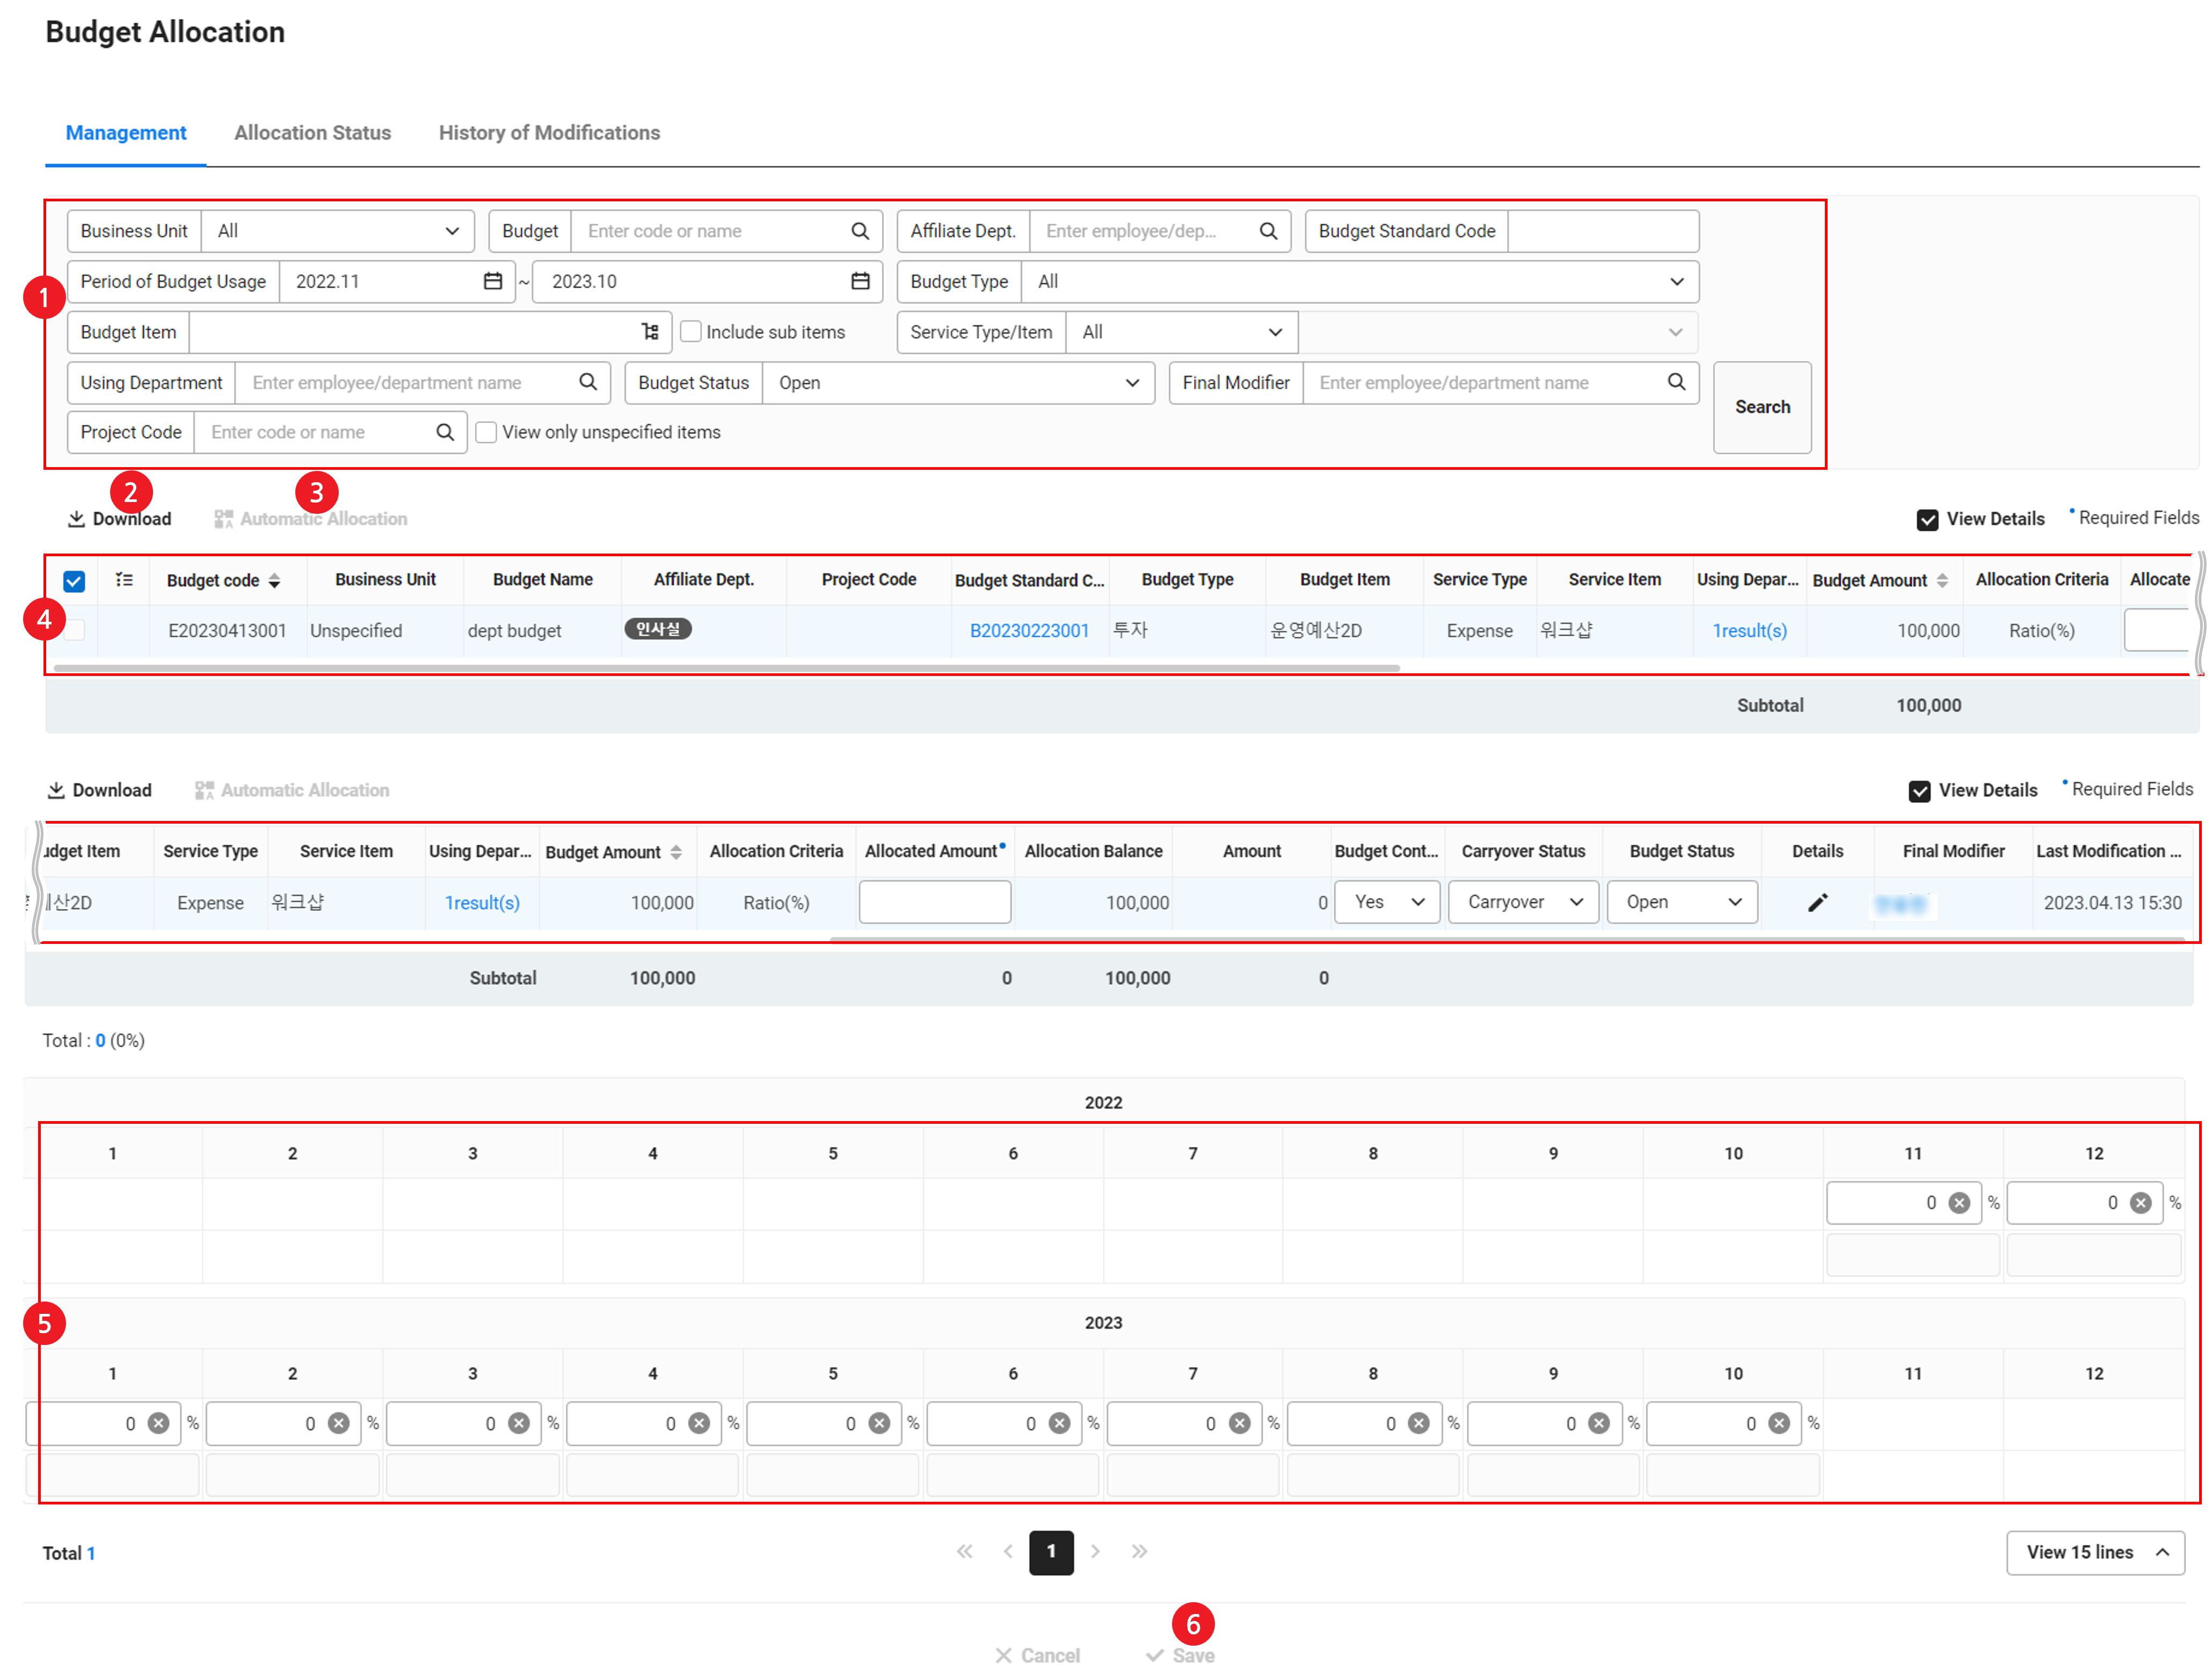
The management page of budget allocation is laid out as follows.
| Area | Description |
|---|---|
| ① Search window | Search based on business place, budget, affiliated department, budget usage period, budget type, budget item, service type/item, using department, budget status, final editor, and project conditions |
| ② Download | Download the list of budget allocations as an Excel file (See Download Budget Allocation History) |
| ③ Allocate Automatically | Click to automatically allocate budgets monthly according to the budget standard (See Allocate Automatically) |
| ④ Budget allocation list | Allocate budget (See Allocate and Set Budget)
|
| ⑤ Monthly Budget Amount | Months for the budget usage period (maximum of 2 year) are displayed, and monthly budget amounts are allocated within the allocation amount range
|
Allocate and Set Budget
You can allocate the budget amount by budget standard mapped to the budget, and set the control status, carryover status, and usage status.
The following describes how to allocate budgets.
- Click the ‘Admin Menu’ at the top right of the PC web screen, and then click ‘Budget’ in the pop-up window.
- Click
 at the top left of the screen.
 - Click ‘Allocate Budget’ from the menu.
- Click the ‘Manage’ tab.
- Enter the amount to be allocated in the allocation amount field of the budget to allocate.
- The allocation amount must be less than or equal to the budget amount.
- If you do not enter the allocated amount, in the case of Allocate Automatically, it is automatically allocated to the monthly allocation table at the bottom for the total budget amount.
- Allocate the allocation amount by month in the monthly budget input area at the bottom of the page.
- Years and months are displayed for the ‘budget usage period’ set upon budget planning.
- The sum of monthly allocation budget amount at the bottom can't exceed the allocation amount entered in Step 5.
- If the allocation standard is Equal or Ratio, it can be allocated through Allocate Automatically.
- Select whether to control budget.
- If budget control is set to ‘Yes’, then requesting expense settlement, requesting approval of expenditure resolution report, and creation of accounting slips are not available when the budget is used in excess of the allocated amount.
- Select the carryover status.
- Carryover of budget balance can be done only within the ‘usage period’. (See Settlement Type in the ‘Settings > Set Budget’ menu)
- Carryover not used: It does not carry over the remaining balance of the allocated budget amount.
- Carryover (month): It carries over the remaining balance of the allocated budget amount to the following month.
- Carryover (within quarter): It carries over the allocated budget amount to the following month within the quarter. Once the period ends, the balance is not carried over to the next quarter.
- Carryover (within half year): It carries over the allocated budget amount to the following month within the half year. Once the period ends, the balance is not carried over to the next quarter.
- Select the budget status.
- In the Closed status, it is not displayed when the user views the budget.
- Click ‘Save’.
- The budget allocation is completed.
- Allocation balance = budget amount - total allocated amount
- Total allocation amount = cumulative amount allocated from January to December if the usage period is one year
- Used amount = cumulative amount used in related services
- Available budget = sum of budget amount allocated for the month and carryover amount
- If the carryover status is ‘Yes’, monthly available budget = carryover amount from previous month + allocated amount for this month - executed amount for this month
- If the carryover status is ‘No’, monthly available budget = allocated amount for this month - executed amount for this month
Allocate Automatically
If the budget allocation standard is set to ‘Equal’ or ‘Ratio’ upon budget planning, it can be allocated automatically.
Budgets with amounts that have already been used can't be automatically allocated. Enter the monthly allocation amount manually.
The following describes how to allocate budgets automatically.
- Click the ‘Admin Menu’ at the top right of the PC web screen, and then click ‘Budget’ in the pop-up window.
- Click at the top left of the screen.
- Click ‘Allocate Budget’ from the menu.
- Click the ‘Manage’ tab.
- Click the budget you want to allocate automatically.
- Check whether the budget has allocation amount. If it doesn't have the allocation amount, see Allocate and Set Budget and enter the allocation amount first.
- Click ‘Allocate Automatically’.
- Monthly allocation amounts based on the allocation standard at the bottom of the budget list are entered. Check monthly allocation amounts.
- Click ‘Save’.
- The automatic budget allocation is completed.
Download Budget Allocation History
The following describes how to download the budget list as an Excel file.
- Click the ‘Admin Menu’ at the top right of the PC web screen, and then click ‘Budget’ in the pop-up window.
- Click at the top left of the screen.
- Click ‘Allocate Budget’ from the menu.
- Click the ‘Manage’ tab.
- If necessary, enter budget conditions to be searched in the Search window, and click ‘Search’.
- You can view the list of budgets that match the entered conditions.
- Click 'Download'.
- The budget allocation history is downloaded as an Excel file.
- The downloaded file is saved as ‘BudgetDetail.xlsx’ in the Download folder.
Allocation Status
You can view the allocation status of the budget.
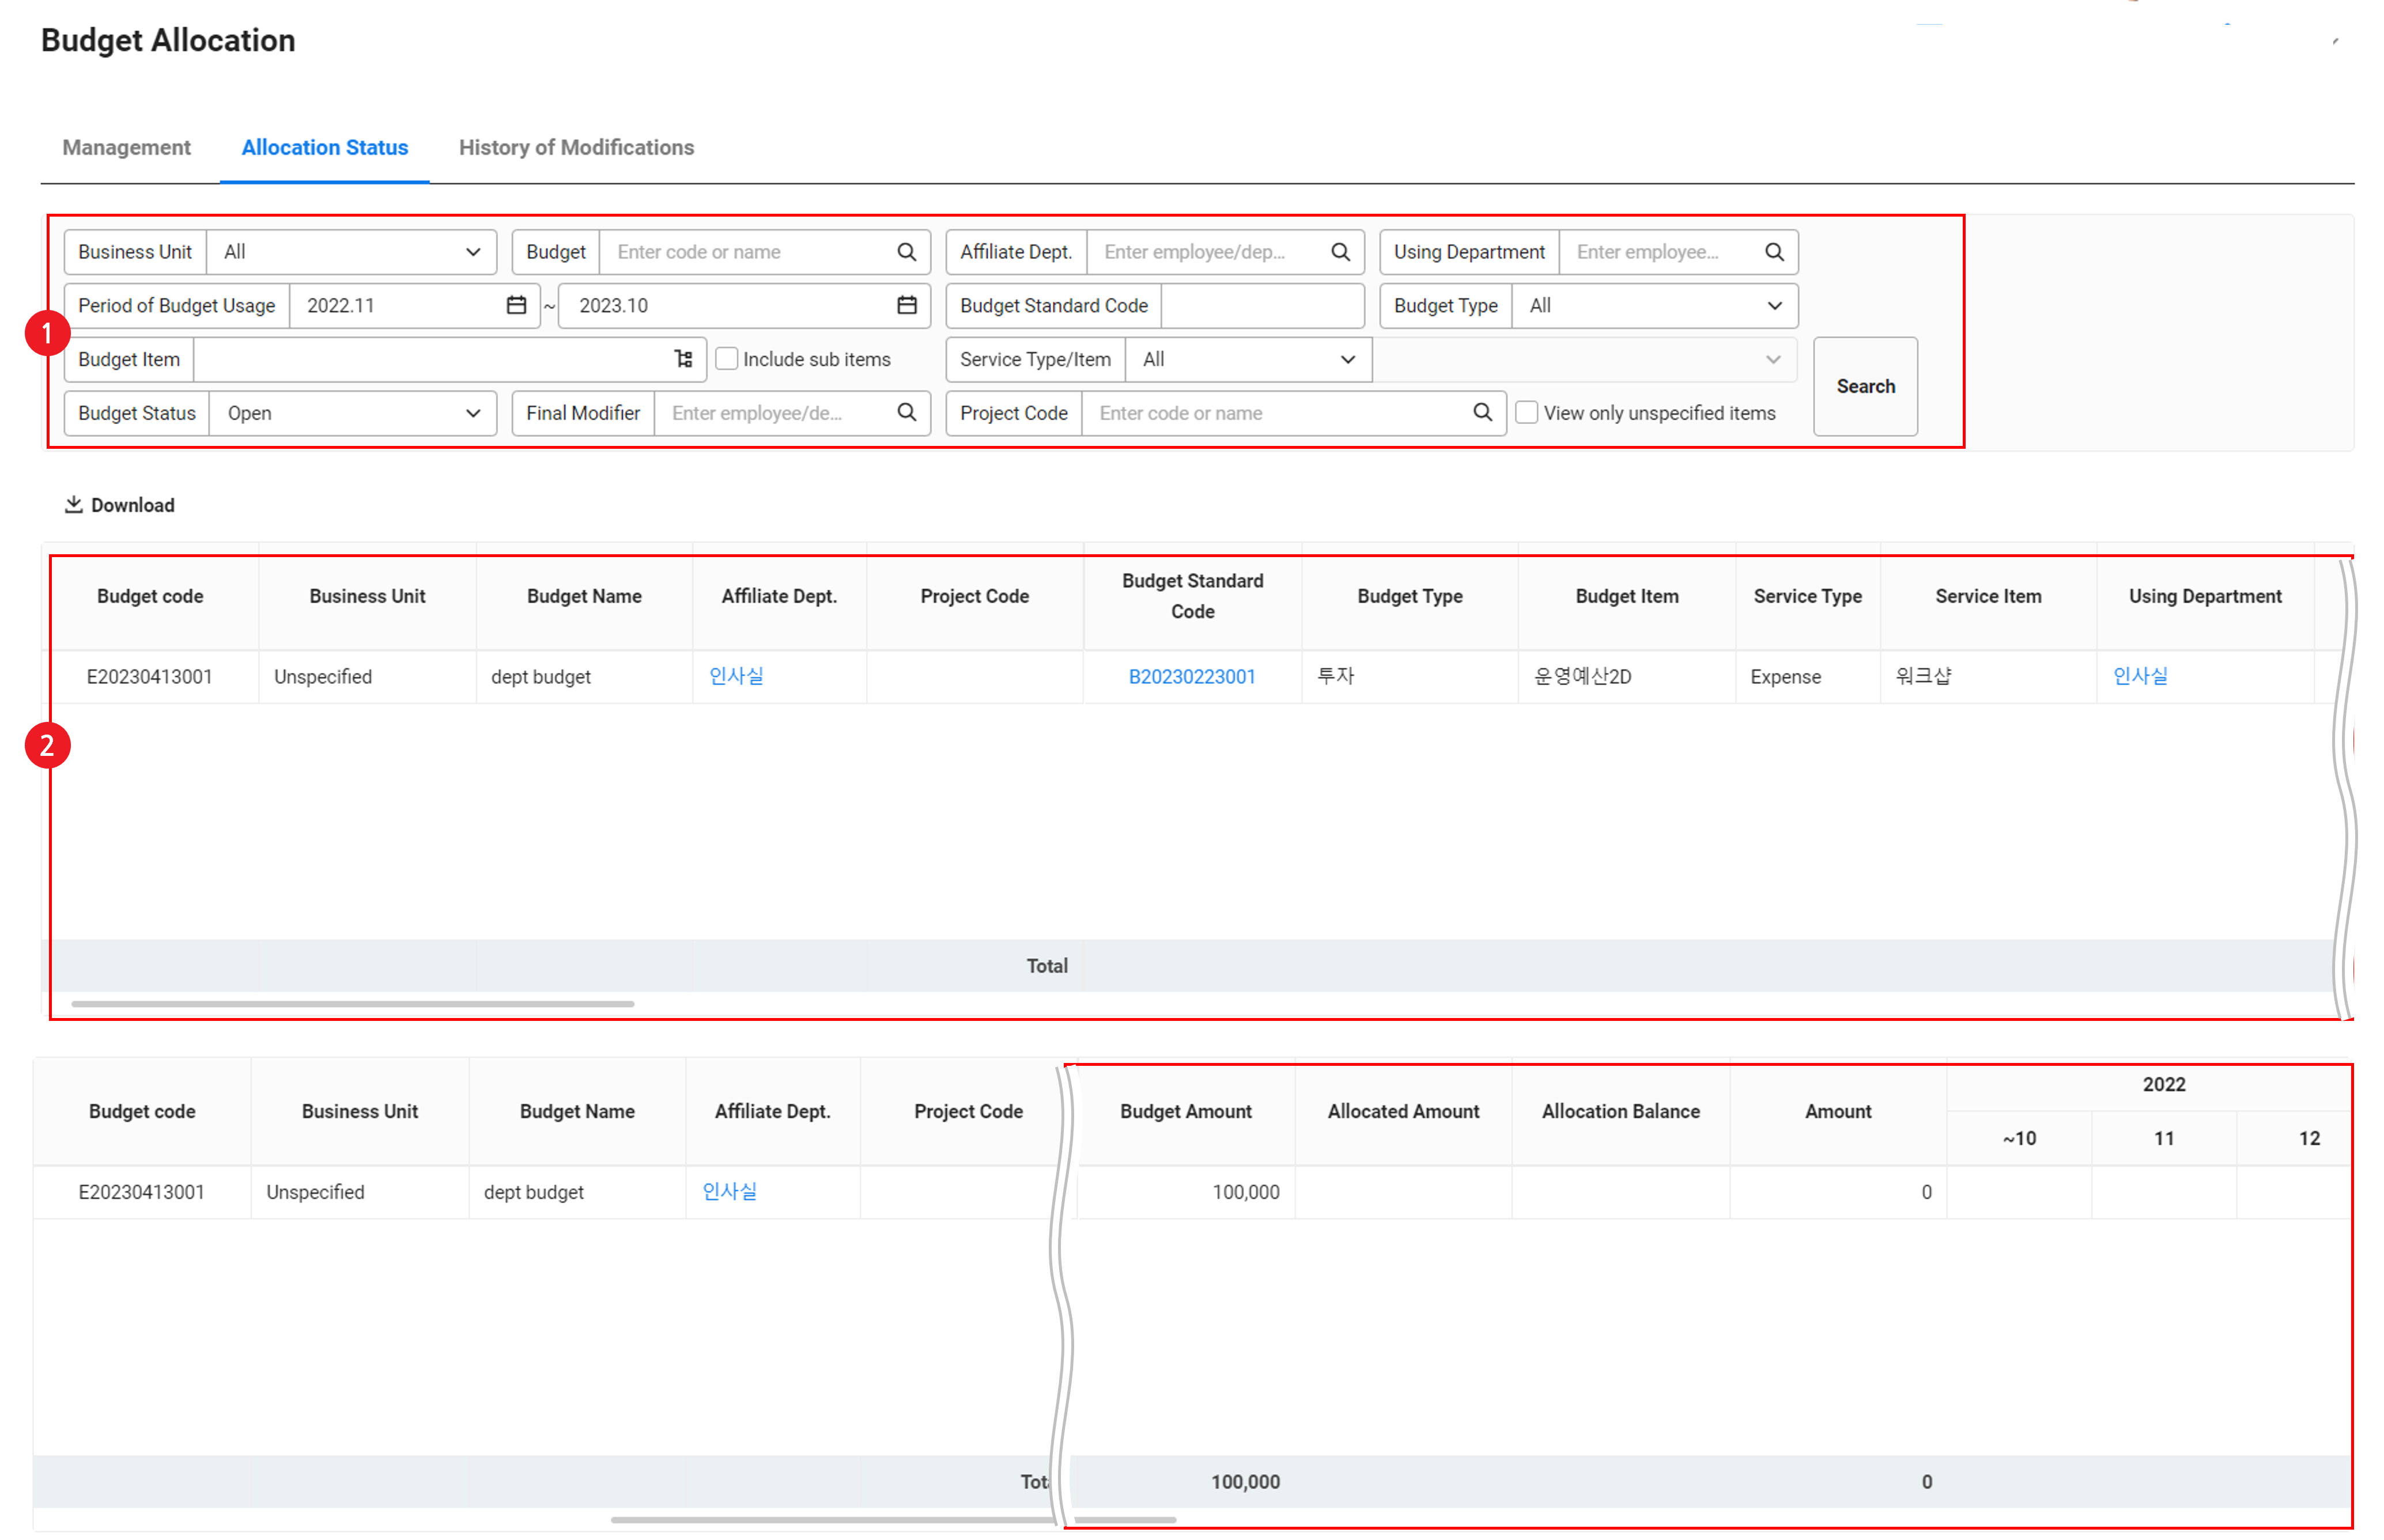
The Budget Allocation Status page is laid out as follows.
| Area | Description |
|---|---|
| ① Search window | Search the budget allocation status based on business place, budget, affiliated department, using department, budget usage period, budget standard code, budget item, service type/item, budget status, final editor, and project conditions |
| ② List of budget allocation | It displays the budget allocation status in a list |
Change History
You can view the change history of budgets.
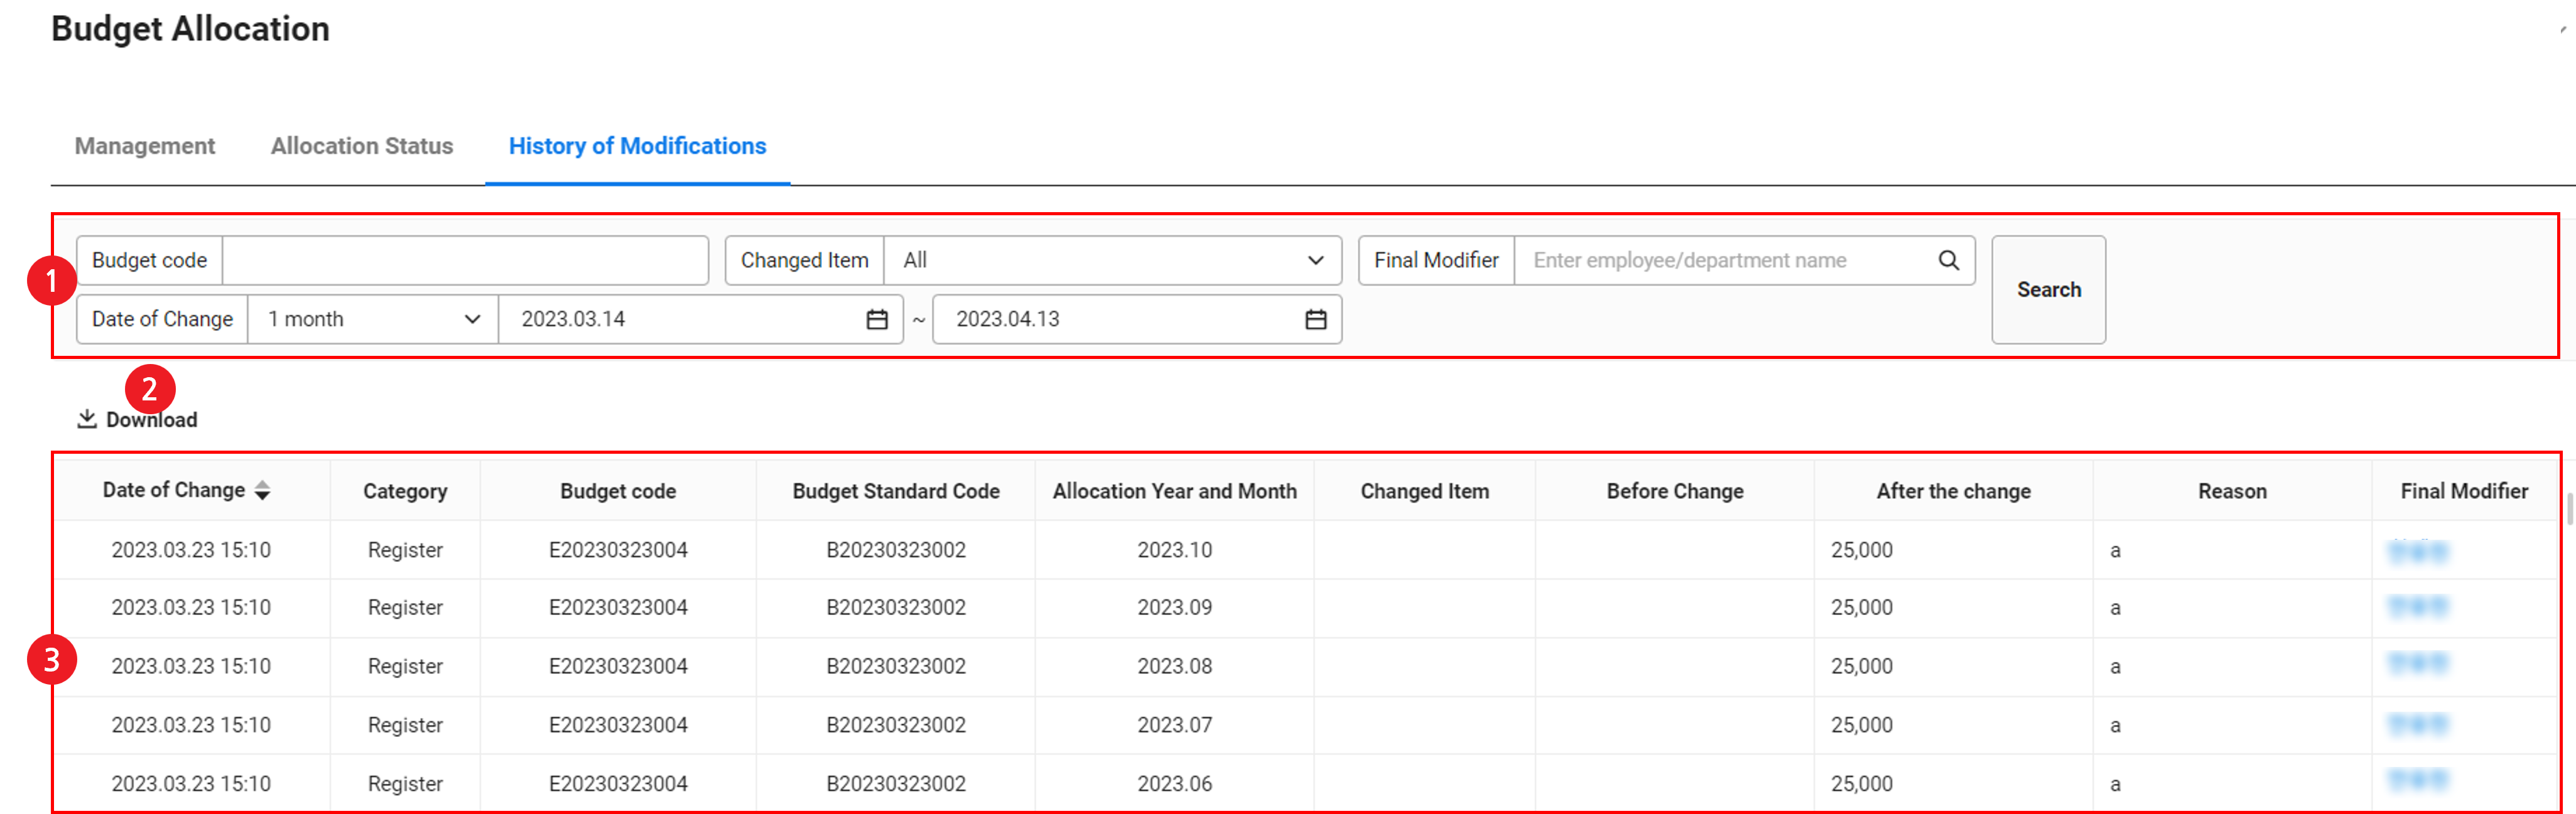
The View Budget Change History page is laid out as follows.
| Area | Description |
|---|---|
| ① Search window | You can search based on budget code, budget name, changed item, final editor, affiliated department, and change date and time conditions |
| ② Download | Download the list of budget changes as an Excel file |
| ③ Budget change list | View changed items in the budget change history and content before and after changes |
Download Budget Change History
The following describes how to download the budget change history as an Excel file.
- Click the ‘Admin Menu’ at the top right of the PC web screen, and then click ‘Budget’ in the pop-up window.
- Click at the top left of the screen.
- Click ‘Allocate Budget’ from the menu.
- Click the ‘Change History’ tab.
- If necessary, enter the budget change conditions to be searched in the Search window, and then click ‘Search’.
- You can view the list of budget changes that match the entered condition.
- Click 'Download'.
- The budget change history is downloaded as an Excel file.
- The downloaded file is saved as ‘DistributionRevision.xlsx’ in the Download folder.