You can add a business account and manage information.
- The Business Account is a feature that can be used by registering an external account necessary for business other than regular resources.
- Business Account menu is only displayed when it is set to ‘Use’ in ‘HR > Set > Manage Business Account Usage’. (See Manage Business Account Usage)
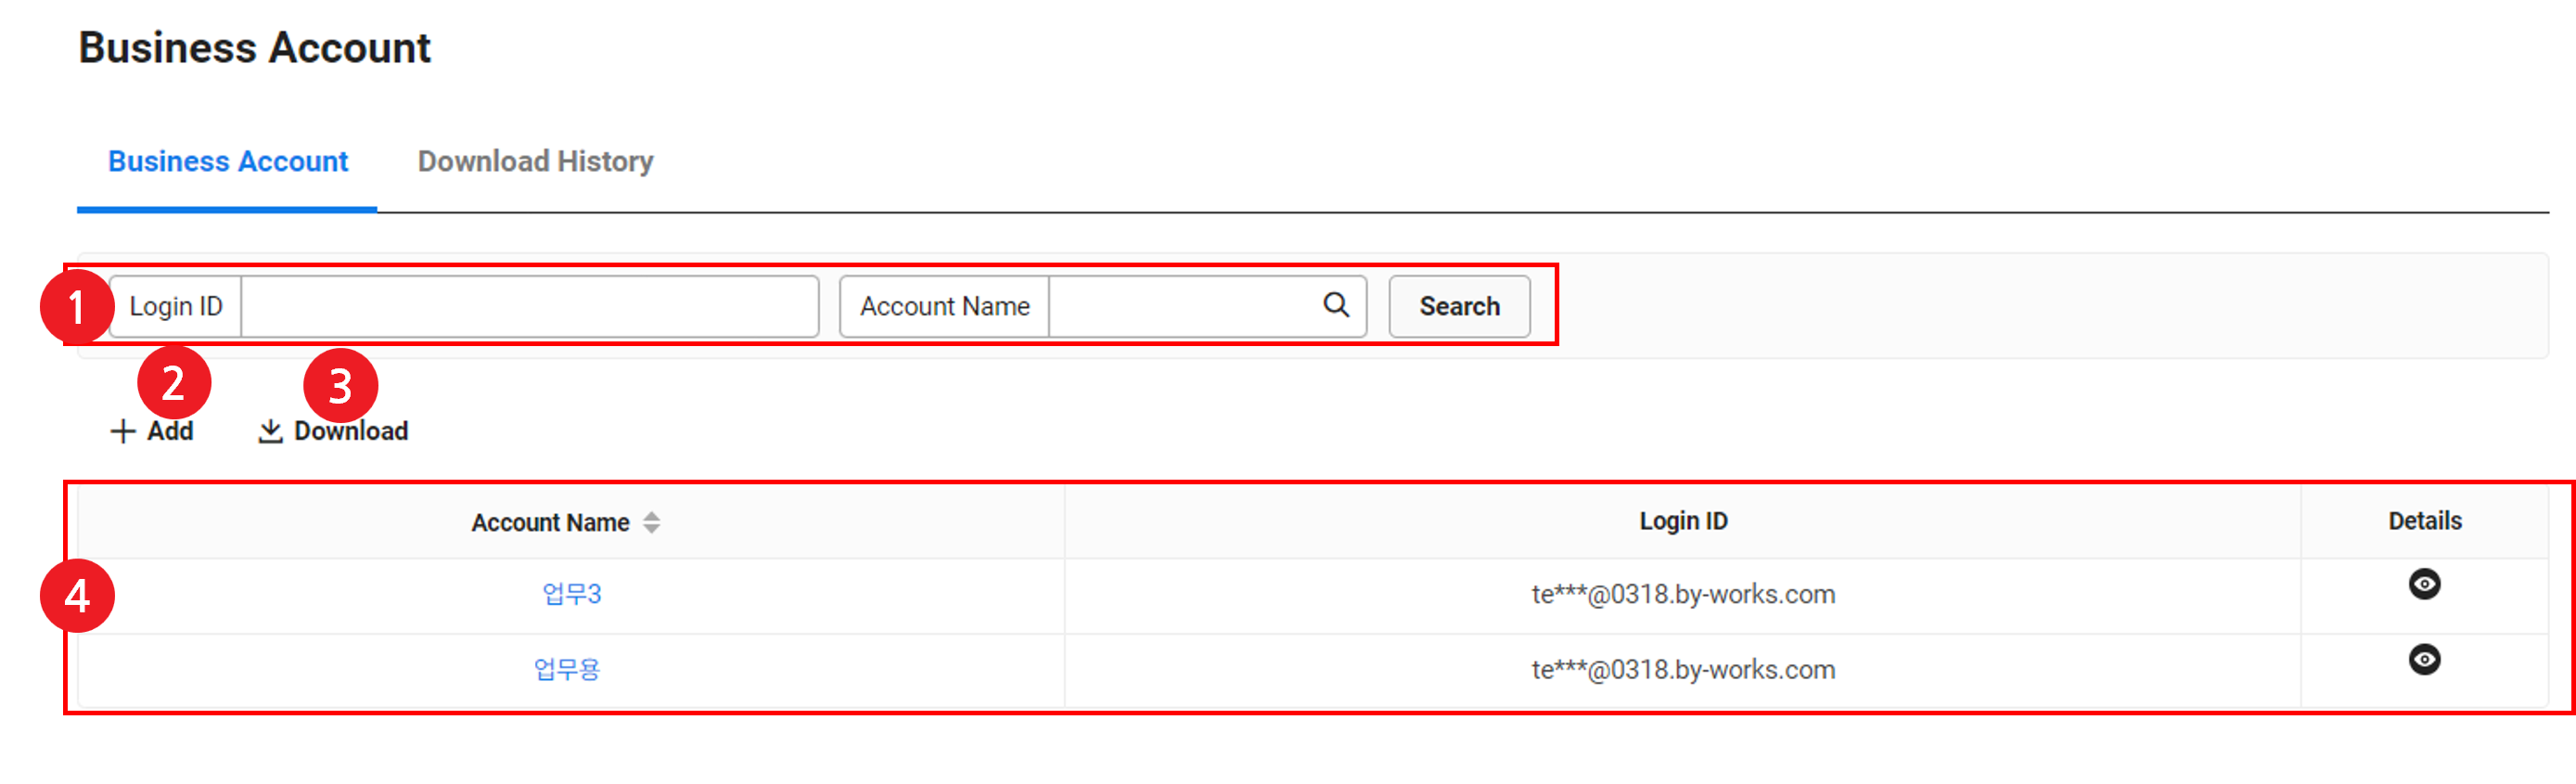
The Manage Business Account menu is laid out as follows.
| Area | Description |
|---|---|
| ① Search window | Search business accounts by use period, login ID and account name |
| ② Add | Add a business account (See Add Business Account) |
| ③ Download | Download the list of business accounts as an Excel file (See Download Business Account List) |
| ④ List of Business Accounts | It displays the business account information
|
Add Business Account
You can use an account registered in 'HR > Members > Employee Management' by converting to a business account.
The usage fee for a business account is identical to that of a regular member.
See the followings for the access restriction range of the business account.
- You can't grant access permissions to the attendance, expense, expenditure, accounting, sales, electronic tax invoice, and payroll service.
- There are limitations on widgets displayed on the home page. (See Detailed Descriptions of Home Widget)
- You can't edit the home page. (See Edit Home)
The following describes how to add a business account.
- Click 'Admin Menu' at the top right of the PC web, and then click 'HR' in the pop-up window.
- Click
 at the top left of the screen.
 - From the menu, click 'Business Account'.
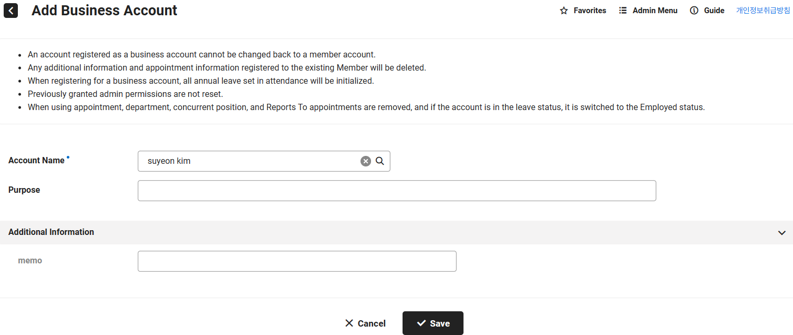
- Click 'Add'.
- Search and select members to convert to a business account by entering their employee name or department name in the account name.
- Accounts of members with a history of creating default approval forms (including temporary saves) cannot be converted to a business account.
- After a member account is converted to a business account, it cannot be converted back to a member account. It will also be removed from the 'HR > Member > Manage Employees' list.
- All basic and additional information of the account will be deleted.
- All information set in Attendance and Payroll services for the account will be deleted.
- Reports to, Appointment, Department Head, Concurrent Position, Concurrent Position in Corporate Group, and Appoint Leave for accounts will all be canceled.
- Enter your intended use.
- Search and select members to convert to a business account by entering their employee name or department name in the account name.
- Enter supplementary information in ‘Supplementary Information’.
The input fields in the additional information section of the business account may vary or be unavailable depending on the configured settings. (See Set Personnel Information)
- Click ‘Save’.
- To cancel adding a business account, click ‘Cancel’.
View and Edit Business Account Details
If you click ![]() of the business account to view in the business account list, account information is displayed on the details page of the business account. You can print the business account information, and edit the supplementary information.
of the business account to view in the business account list, account information is displayed on the details page of the business account. You can print the business account information, and edit the supplementary information.
Edit Business Account Information
If you are using Appointment, you can edit only Intended Use and Supplementary Information. To edit other basic information, go to 'Admin > Member'.
If you don't use Appointment, you can directly edit department, job position, user type, and job title of basic information.
- Click
 of an account to edit information in the business account list.
 - Apply the content to be edited.
- Click ‘Save’.
Delete Business Account
The following describes how to delete business account.
- Click of an account to delete information in the business account list.
- If you are using Appointment, click ‘Delete’ at the bottom of the HR Card.
- If you do not use Appointment, delete the account from ‘Admin > Member’.
Print Business Account Information
- Click of an account to print out the information in the business account list.
- Click 'Print' at the bottom of the screen.
- When a Print pop-up window appears, check the details to be printed and click ‘Print’.
Download Business Account List
The following describes how to download the list of business accounts as an Excel file.
- Click 'Admin Menu' at the top right of the PC web, and then click 'HR' in the pop-up window.
- Click at the top left of the screen.
- From the menu, click 'Business Account'.
- If necessary, enter the business account conditions to be searched in the search window, and then click ‘Search’.
- You can view the business account list that applies to the entered conditions.
- Click 'Download'.
- Document Open Password (Verify): Enter a password required to view a downloaded document.
- Reason for Download: Enter the reason for the download. You can view the entered reason in the download history.
- Click 'Download'.
- The list of business account is downloaded as an Excel file.
- You can check the download history in the ‘Download History’ tab.
[YYYY-MM-DD]workAccount_members.xlsx in the `Downloads` folder.Download History
The following describes how to view the download history of the business account list as an Excel file.
- Click 'Admin Menu' at the top right of the PC web, and then click 'HR' in the pop-up window.
- Click at the top left of the screen.
- Click the ‘Download History’ tab in ‘Business Account’ from the menu.
- If necessary, enter the period to be searched and the employee name who downloaded the document in the search window, and then click ‘Search’.
- You can view the download history that matches the entered conditions.