On the HR Home, you can check the date of reorganization, HR status, the number of request for issuing certificates, and status of checklist, as well as manage setting items required for using the HR service. You can also view the log history recorded in the HR menu.
To access the HR Home menu, click ‘HR Home’ in the left-side menu of the HR service.
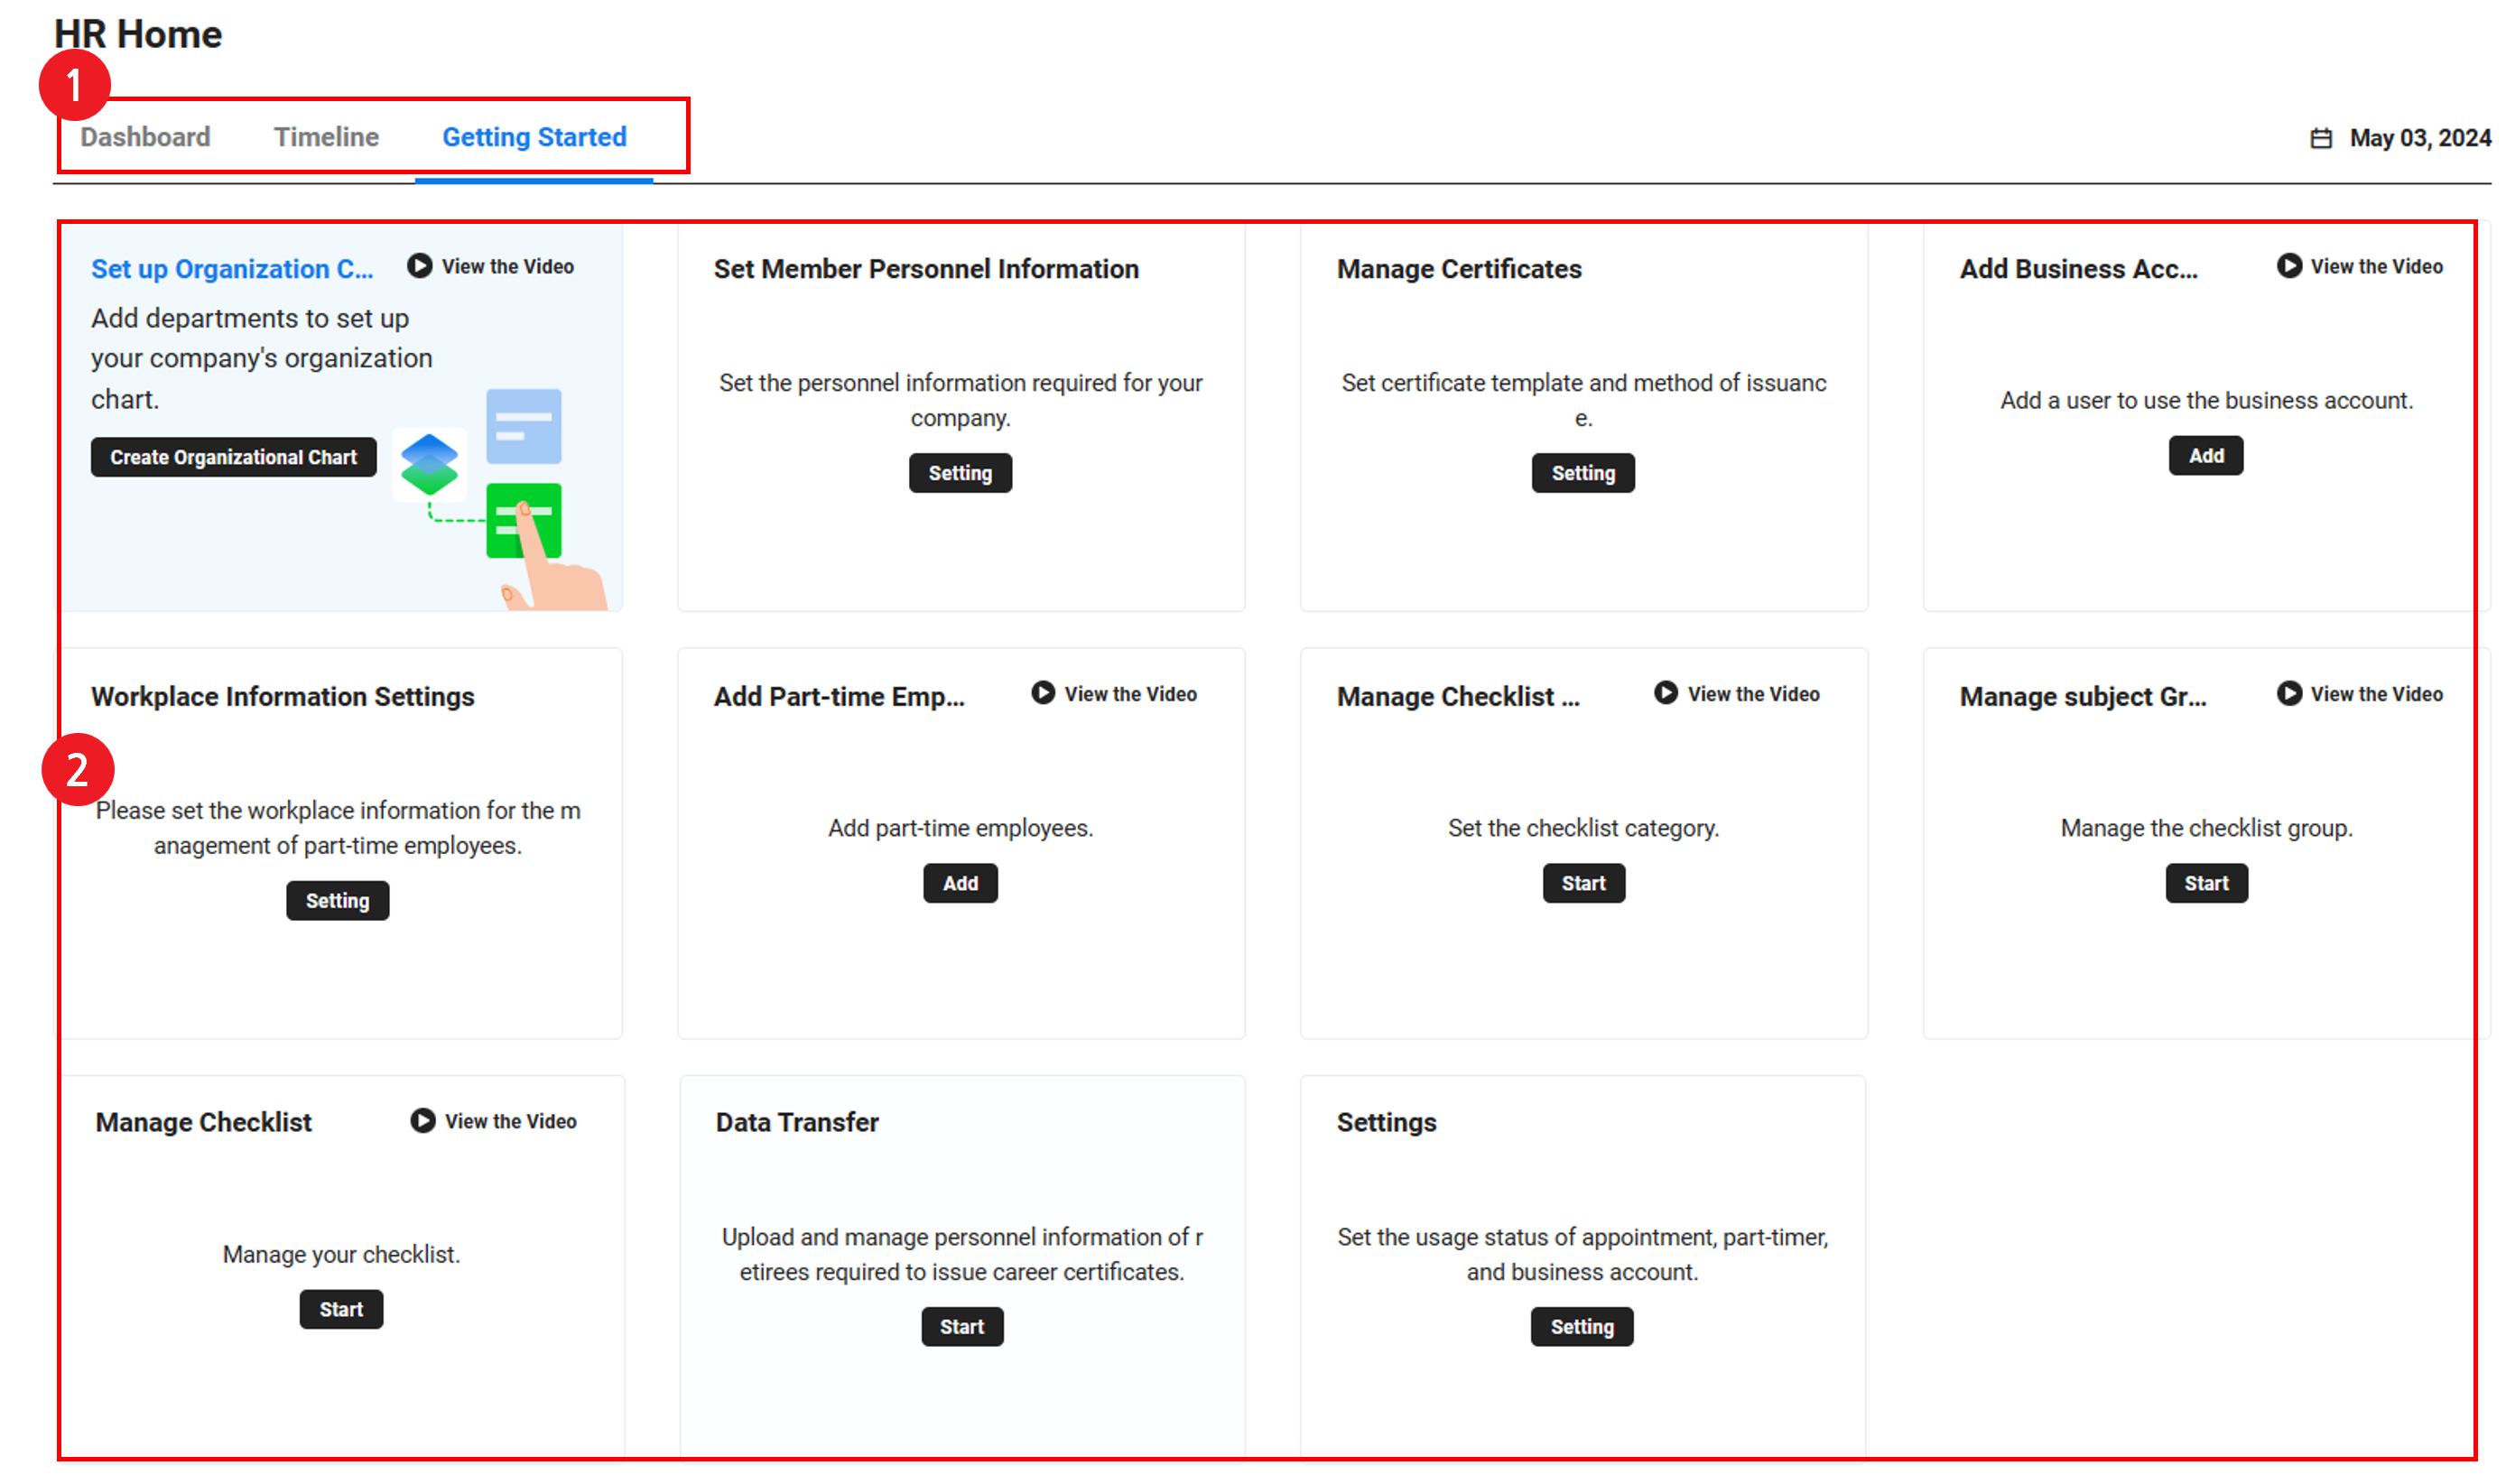
The HR Home screen is laid out as follows.
| Area | Description |
|---|---|
| ① Content Tab | Select the content to be displayed in the Content Area
|
| ② Content area |
|
- Only the menus and cards that have been granted access permissions are displayed in the Content tab or area
- Recorded logs can't be deleted, and when their number exceeds 100, the oldest log is automatically deleted.
Getting Started
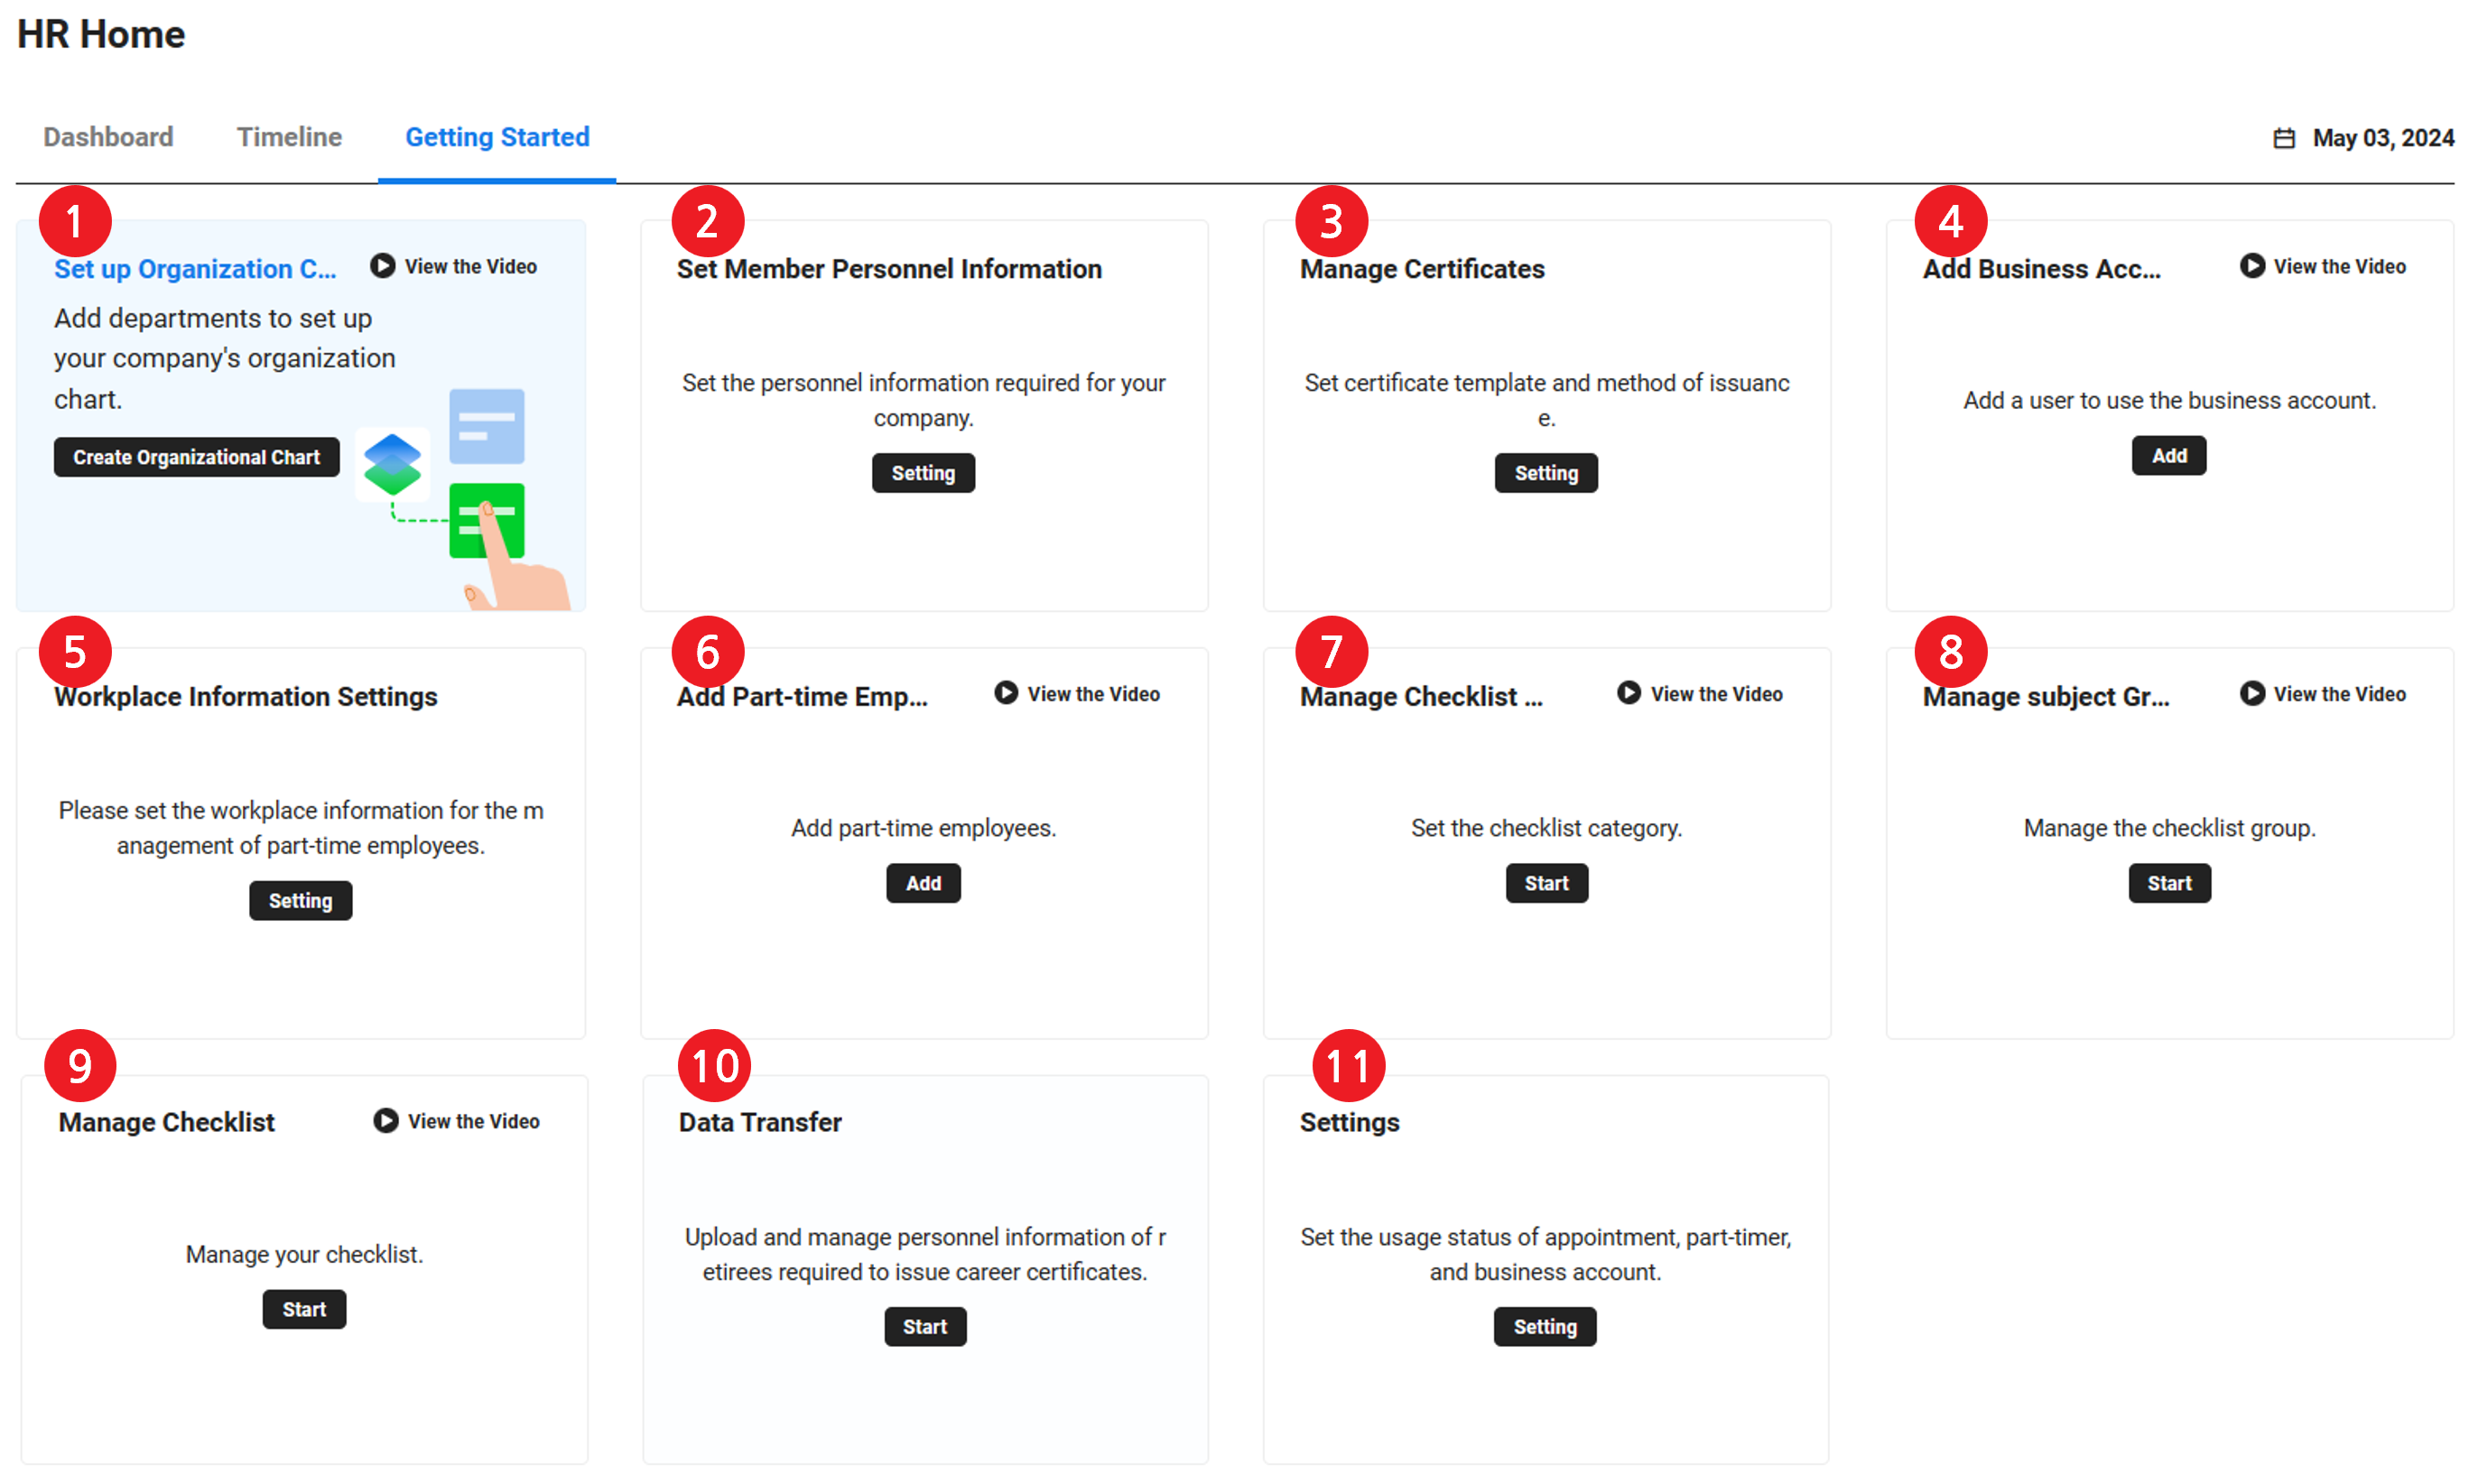
When you access the HR service for the first time, the Getting Started page will guide you through how to set HR service-related information. Each setting is displayed in the form of a closed card. Click once on a card to open the card showing its default configuration, and click on an item to be redirected.
To use the HR service more conveniently, follow the order of cards in the Getting Started page and complete the settings for all items.
| Area | Description |
|---|---|
| ① Set up Organization Chart | Open the Manage Organization Chart menu where you can reorganize
|
| ② Member Basic Information Settings | Open the Set Personnel Information menu where you can set the personnel information required for the company |
| ③ Manage Certificates | Open the Manage Certificates menu where you can add and manage certificates that can be applied for issuance |
| ④ Add Business Account | Open the Business Account menu where you can add a business account |
| ⑤ Workplace Information Settings | Open the Manage Workplace menu where you can add and manage workplace for managing part-timers |
| ⑥ Add Part-time Employee | Open the Manage Part-time Employee menu where you can add a part-time employee |
| ⑦ Manage Checklist Category | Open the Manage Category menu where you can set checklist categories |
| ⑧ Manage Checklist Group | Open the Manage Checklist Group menu where you can add and manage checklists according to the purpose |
| ⑨ Manage Checklist | Open the Manage Checklist menu where you can add and manage checklists for new employees and retired employees |
| ⑩ Migrate Data | Open the ‘Import Data’ menu, where you can upload and manage the personnel information of retired employees required for issuing career certificates |
| ⑪ Preferences | Open the Settings menu where you can set whether to use Appointment, Business Account, Part-timer, and Payroll |
Dashboard
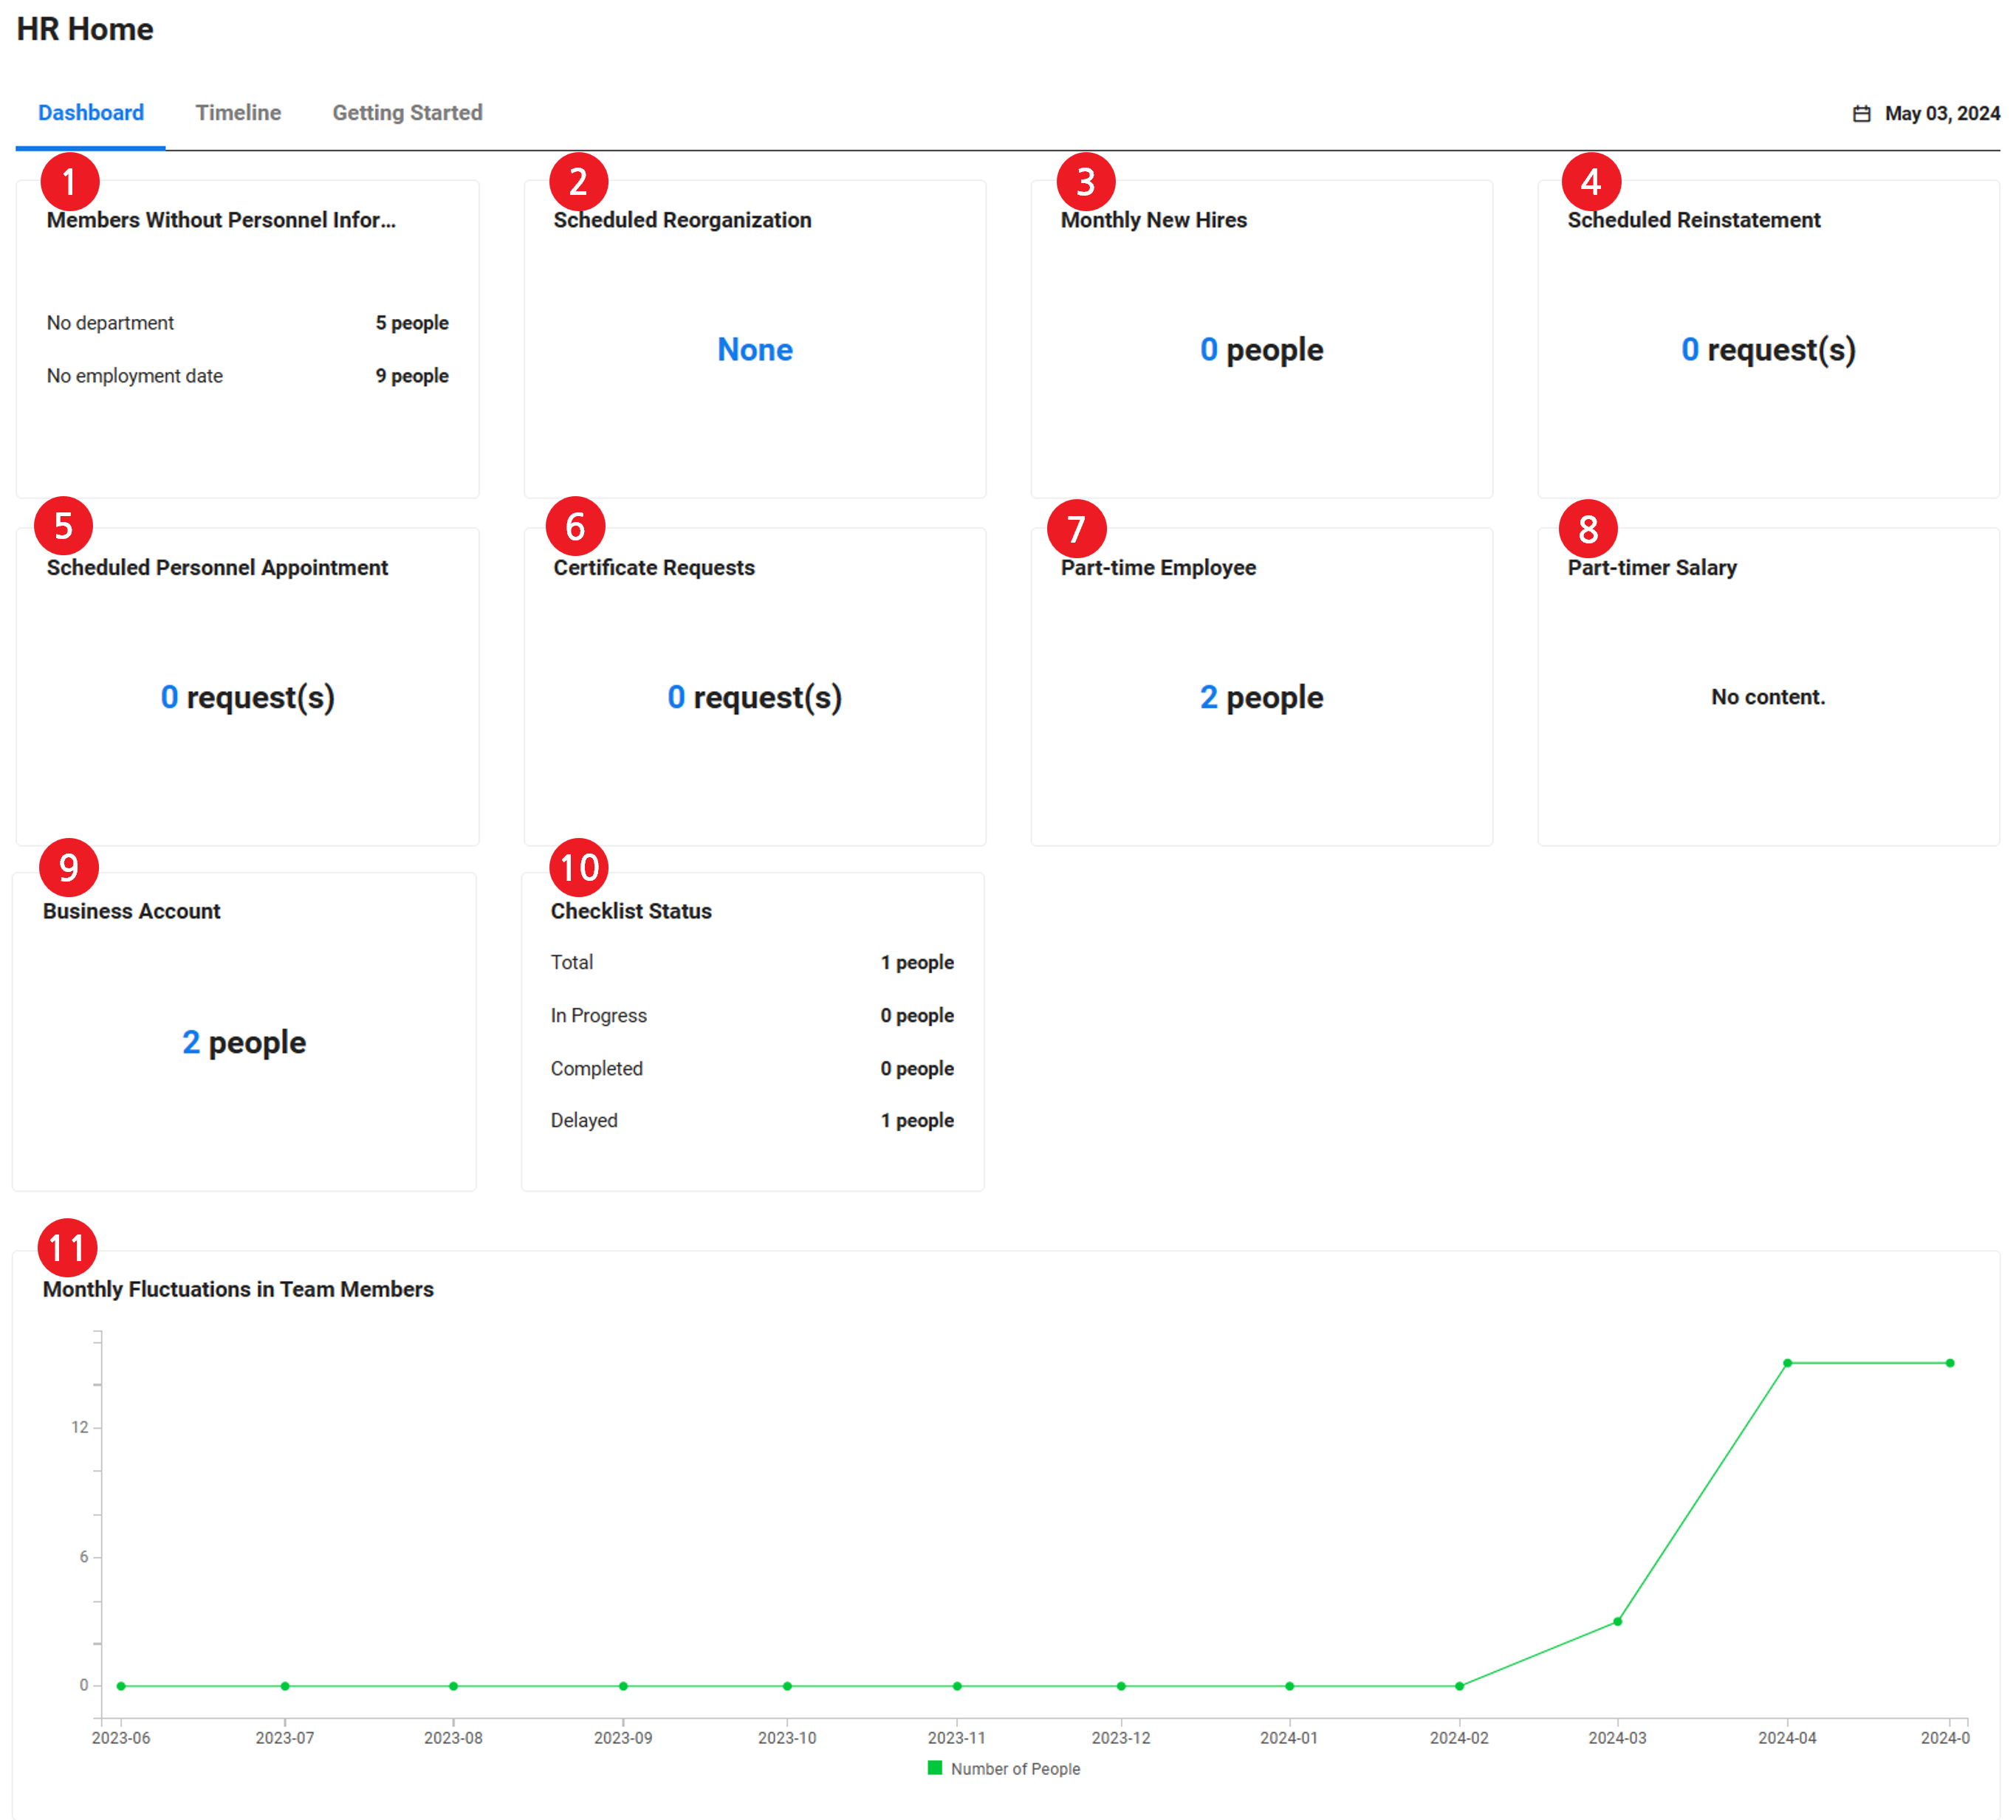
After completing all the settings on Getting Started page, when you access the HR service, the Dashboard screen will appear. The Dashboard screen displays the HR-related summary in the card form.
The following cards are displayed in the Dashboard screen.
| Area | Description |
|---|---|
| ① Members Without Personnel Information |
|
| ② Scheduled Reorganization Date |
|
| ③ Monthly New Hires |
|
| ④ Scheduled Reinstatement |
|
| ⑤ Scheduled Personnel Appointment |
|
| ⑥ Request Issuing Certificates |
|
| ⑦ Part-timer contract |
|
| ⑧ Part-timer payroll |
|
| ⑨ Business Account Use Status |
|
| ⑩ Checklist Status |
|
| ⑪ Monthly Fluctuations in Team Members |
|
- The Scheduled Reorganization Date, Scheduled Reinstatement, and Scheduled Personnel Appointment cards are only displayed when the Appointment in ‘Set > Set Members’ menu is set to ‘Use’.
- The Part-timer Contract, and Part-timer Payroll cards are only displayed when the use of Part-timer in ‘Set > Manage Use of Part-timers’ menu is set to ‘Use’.
- The Business Account Use Status are only displayed when the use of Business Account in ‘Set > Manage Business Account Use’ menu is set to ‘Use’.
Timeline
Displays up to 100 use logs of the HR service for the last one month in the newest order. Click the link for each item to go to the related menu.