This feature is available after applying for WORKS Approval.
You can configure the report page on which you can view and analyze data in approval documents, as well as grant task manager permissions.
The Manage Approval Document Report page is laid out as follows.
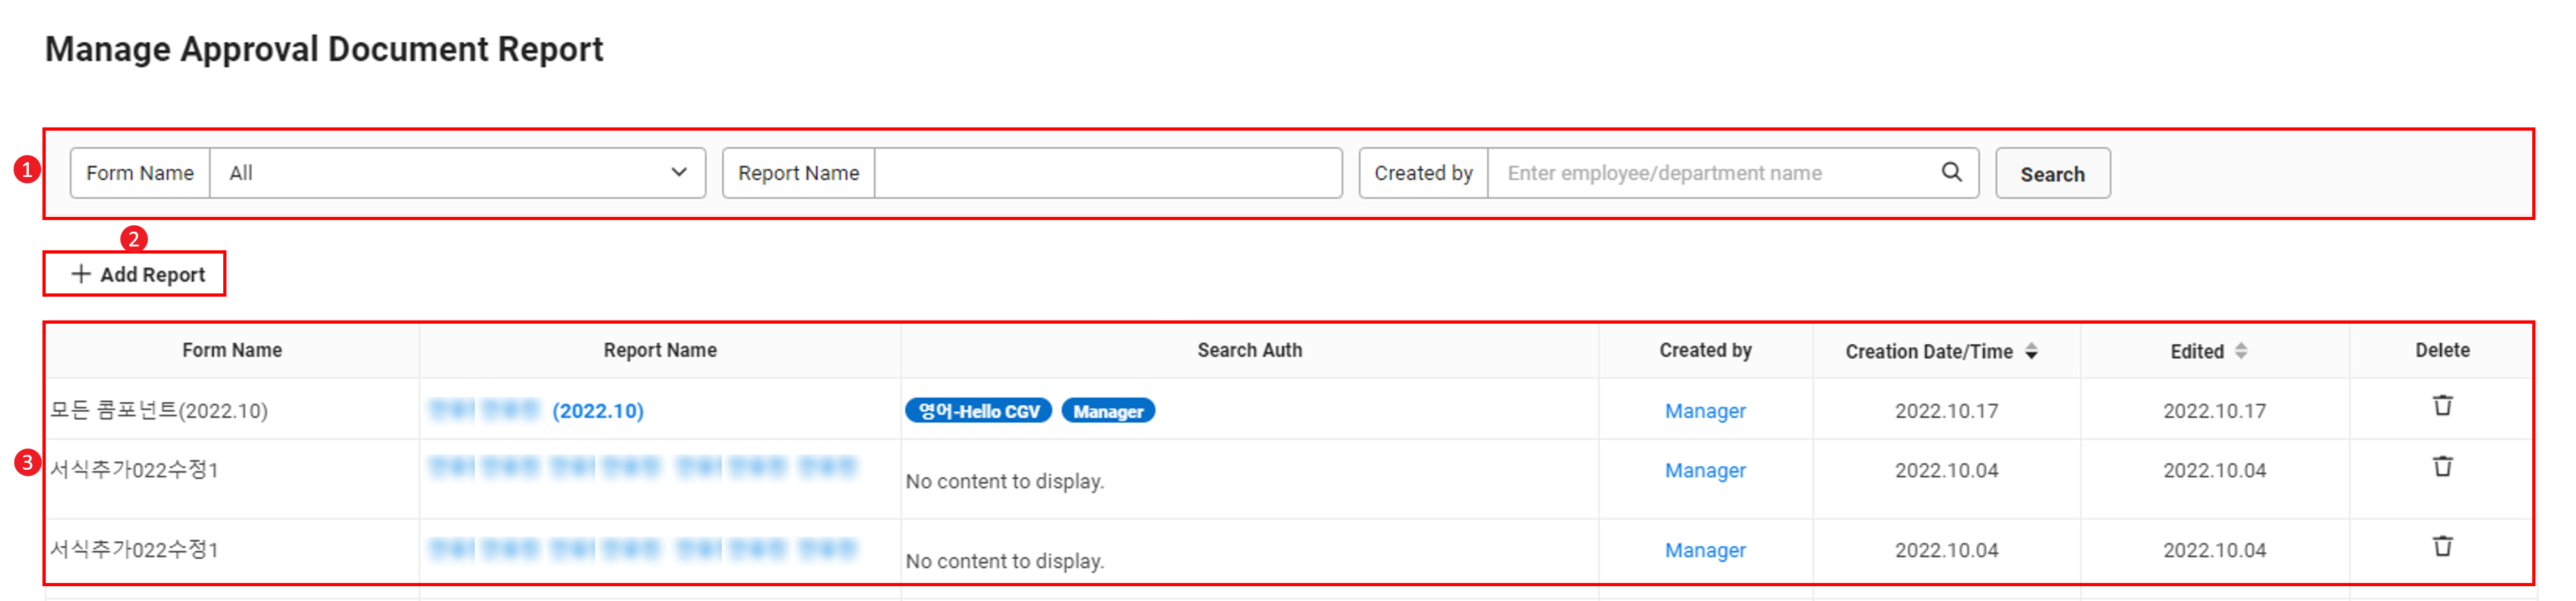
| Area | Description |
|---|---|
| ① Search window | Search approval document reports by the form name, report name, and creator conditions |
| ② Add Report | Add reports of approval documents |
| ③ Approval document list | View created approval document reports in a list, and then click the report name to view the details of each report
|
The following describes how to add an approval document report of a form.
- Click the ‘Admin Menu’ at the top right of the PC web screen, and then click ‘Manage Approval’ in the pop-up window.
- Click
 at the left of the screen.
 - Click ‘Managing Approval Document Report’ from the menu.
- Click Add Report.
- Select the category of the form whose report you want to create, as well as the form. You can click ‘Preview’ to preview the form.
- Enter the report name.
- Click ‘Add Viewing Permission’ to set the viewing permissions for the report.
- Grant to department: All members of the department will see the 'Approval Home > View Approval Document Report' menu and can view the authorized approval document report. (sub-departments of the selected department, including members who are in a concurrent position)
- Grant to employee: The Approval Home > View Approval Document Report menu is displayed for the employee, and they can view approval document reports for which they have permissions.
- When granting permissions to more than one department or employee, click ‘Add Viewing Permission’ to add them.
- When using as a corporate group, you can add employees or departments from the entire corporate group.
- Click 'Report Editor' to edit the report page of the approval document.
- For more details on how to edit, see Report Editor.
- Click ‘Save’.
- If you edit and save the form, then the last edit date and time and editor name are displayed.
- The approval document report is created, and can be searched from the list.
Report Editor
You can edit the report page where you can view the data entered to items that make up the form, and then analyze the results.
The Edit Approval Document Report page is laid out as follows.
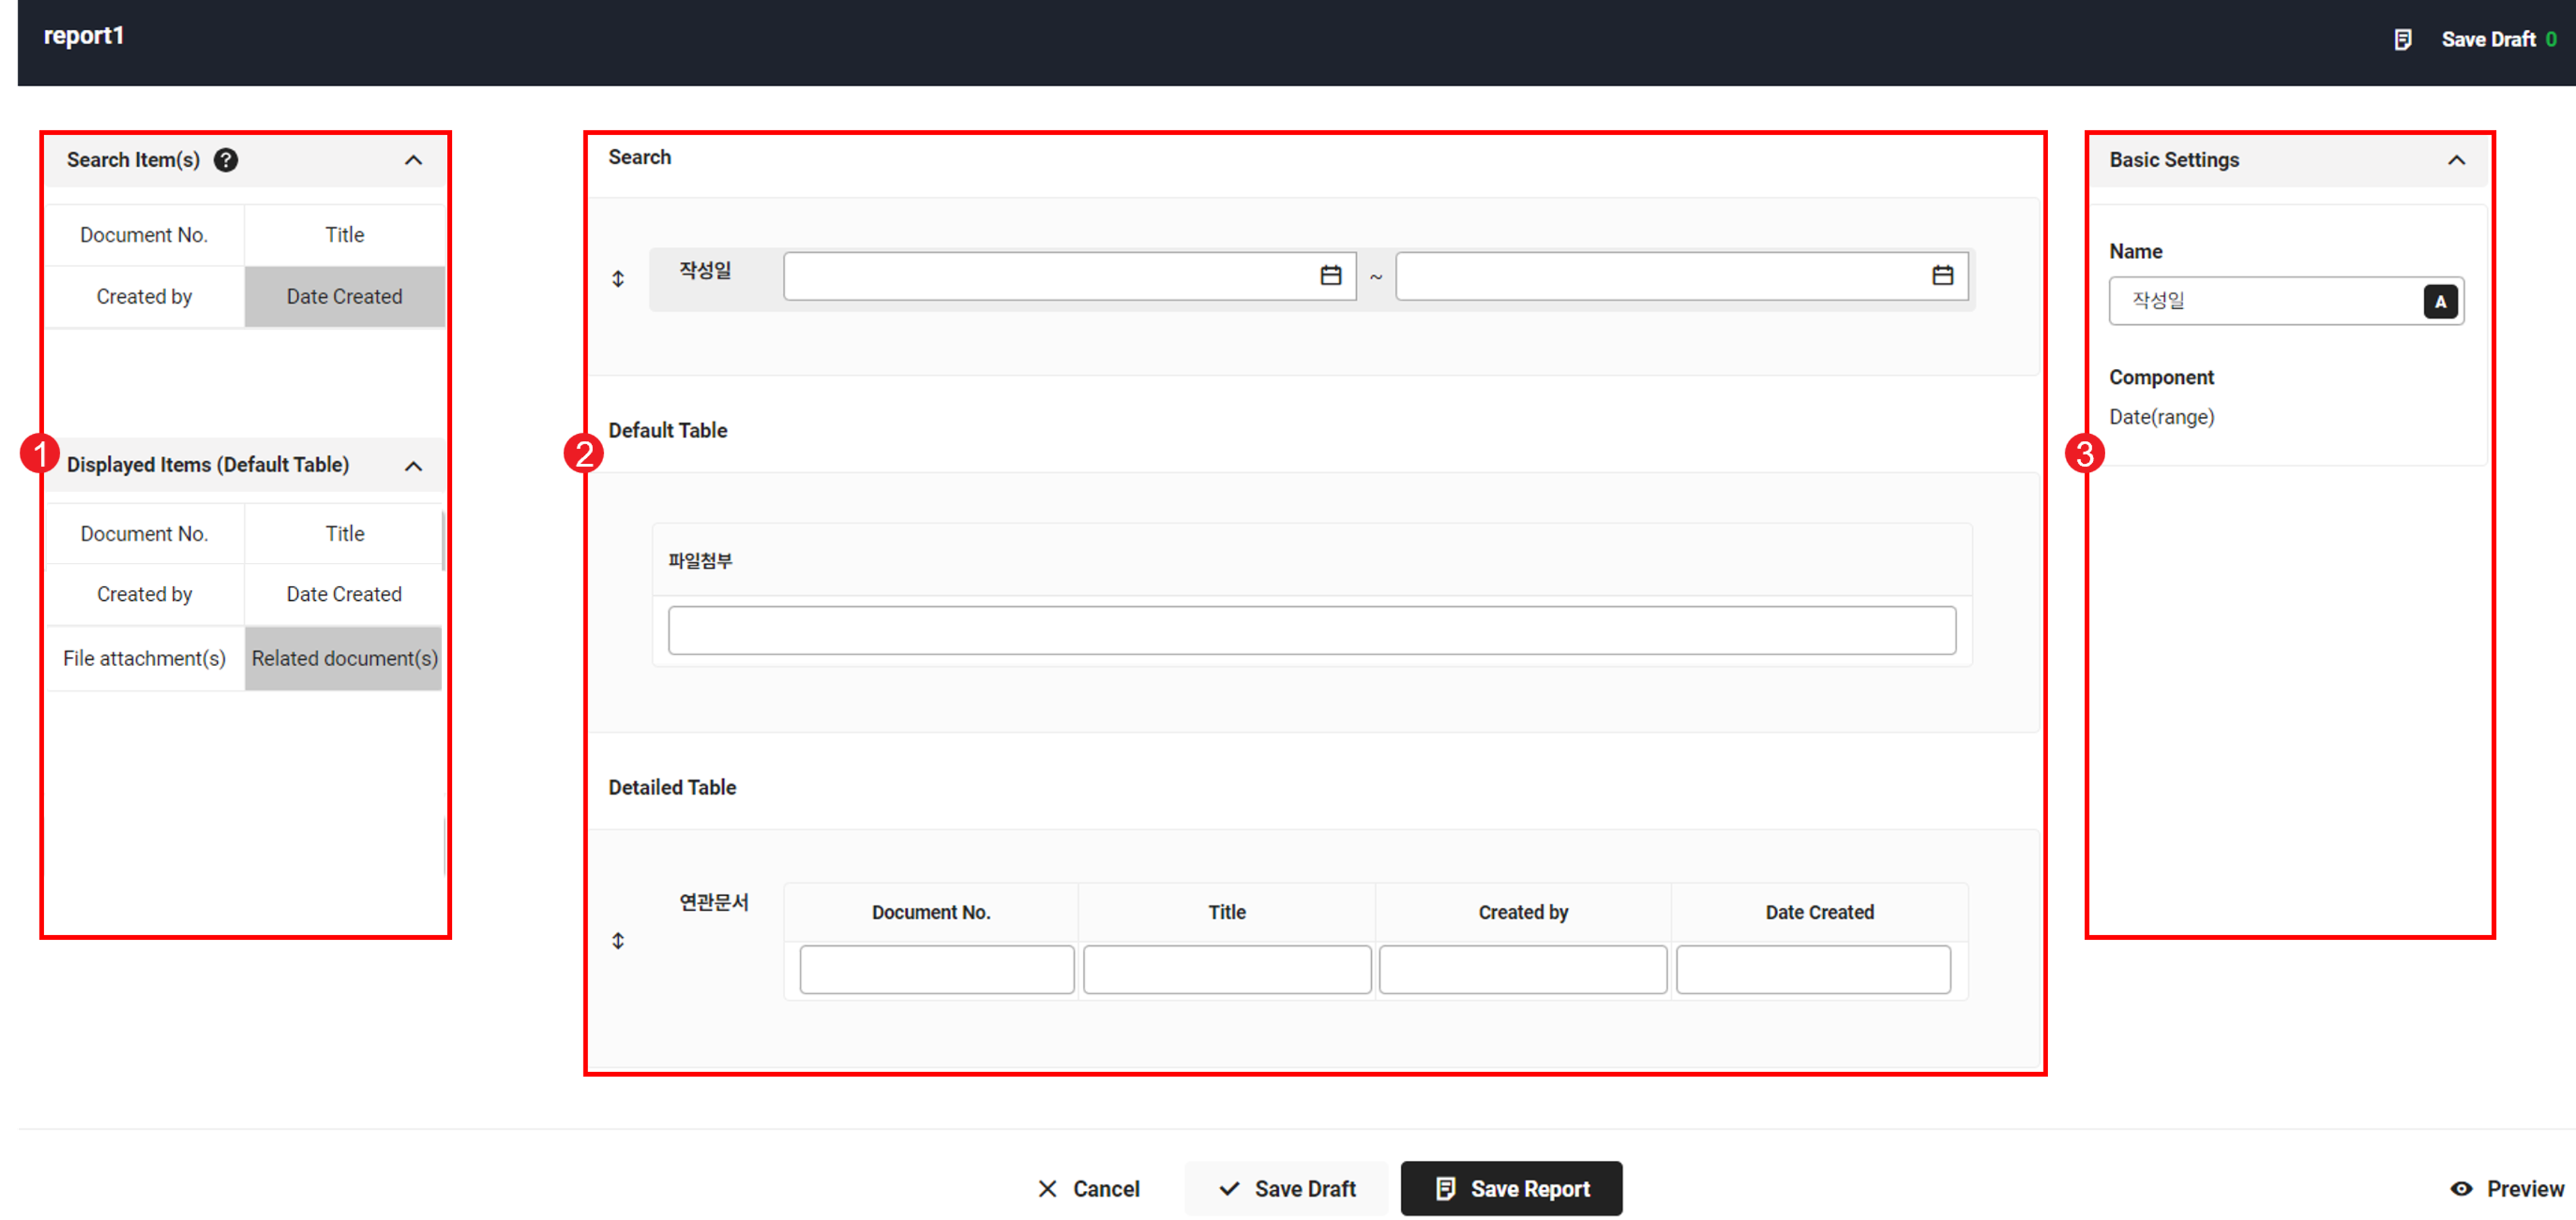
| Area | Description |
|---|---|
| ① Item Selection area | Search items and display items that can be added to the Displayed Page area
|
| ② Displayed Page area | This area configures the Manage Approval Document Report page to be displayed to the user by adding items with the drag and drop method. The search result items are divided into the default table and detailed table. Most items are provided in the basic table. If multiple values are included in one item, then it can be additionally displayed in the detailed table
|
| ③ Detailed Settings area | It is an area to enter the settings for added items
|
| ④ Save Temporarily | Temporarily save the edited report page |
| ⑤ Save Report | Save the edited report page |
The following describes how to configure the approval document report page.
- Click items in the Item Selection area, add them to the appropriate section of the Displayed Page area by dragging and dropping, and enter the detailed settings.
- The type of each item (component) displayed in the edit page differs by the configuration of the selected form.
- Click ‘Save’.
- To save the current content temporarily, click ‘Save Temporarily’. The temporarily saved forms can be checked and loaded from the Save Temporarily list at the top right.
- To preview the created View Document page, click ‘Preview’.
- To save the current content temporarily, click ‘Save Temporarily’. The temporarily saved forms can be checked and loaded from the Save Temporarily list at the top right.
Approval Document Report Detailed Table
The values displayed on the detailed table when configuring the Approval Document Report page are as follows.
| Item Name (Component Name) | Values Displayed on Detailed Table |
|---|---|
| Multi-text | Input value |
| Multi-select box | Selected value |
| Input value | Input value |
| Formula table | Input value |
| Checkbox | Selected value |
| File attachment | Name of attached file |
| Search Employees | Selected value |
| Related document | Selected value |
| Select Department | Selected value |