You can manage the forms for official document sending and view the request history for official documents.
Manage Official Document
You can add and manage official document sending forms that can be requested by users.
The Official Document Receipt Request form is provided by default if the company uses official document receipt and sending, and it can't be edited or added.
The Manage Official Document page is laid out as follows.
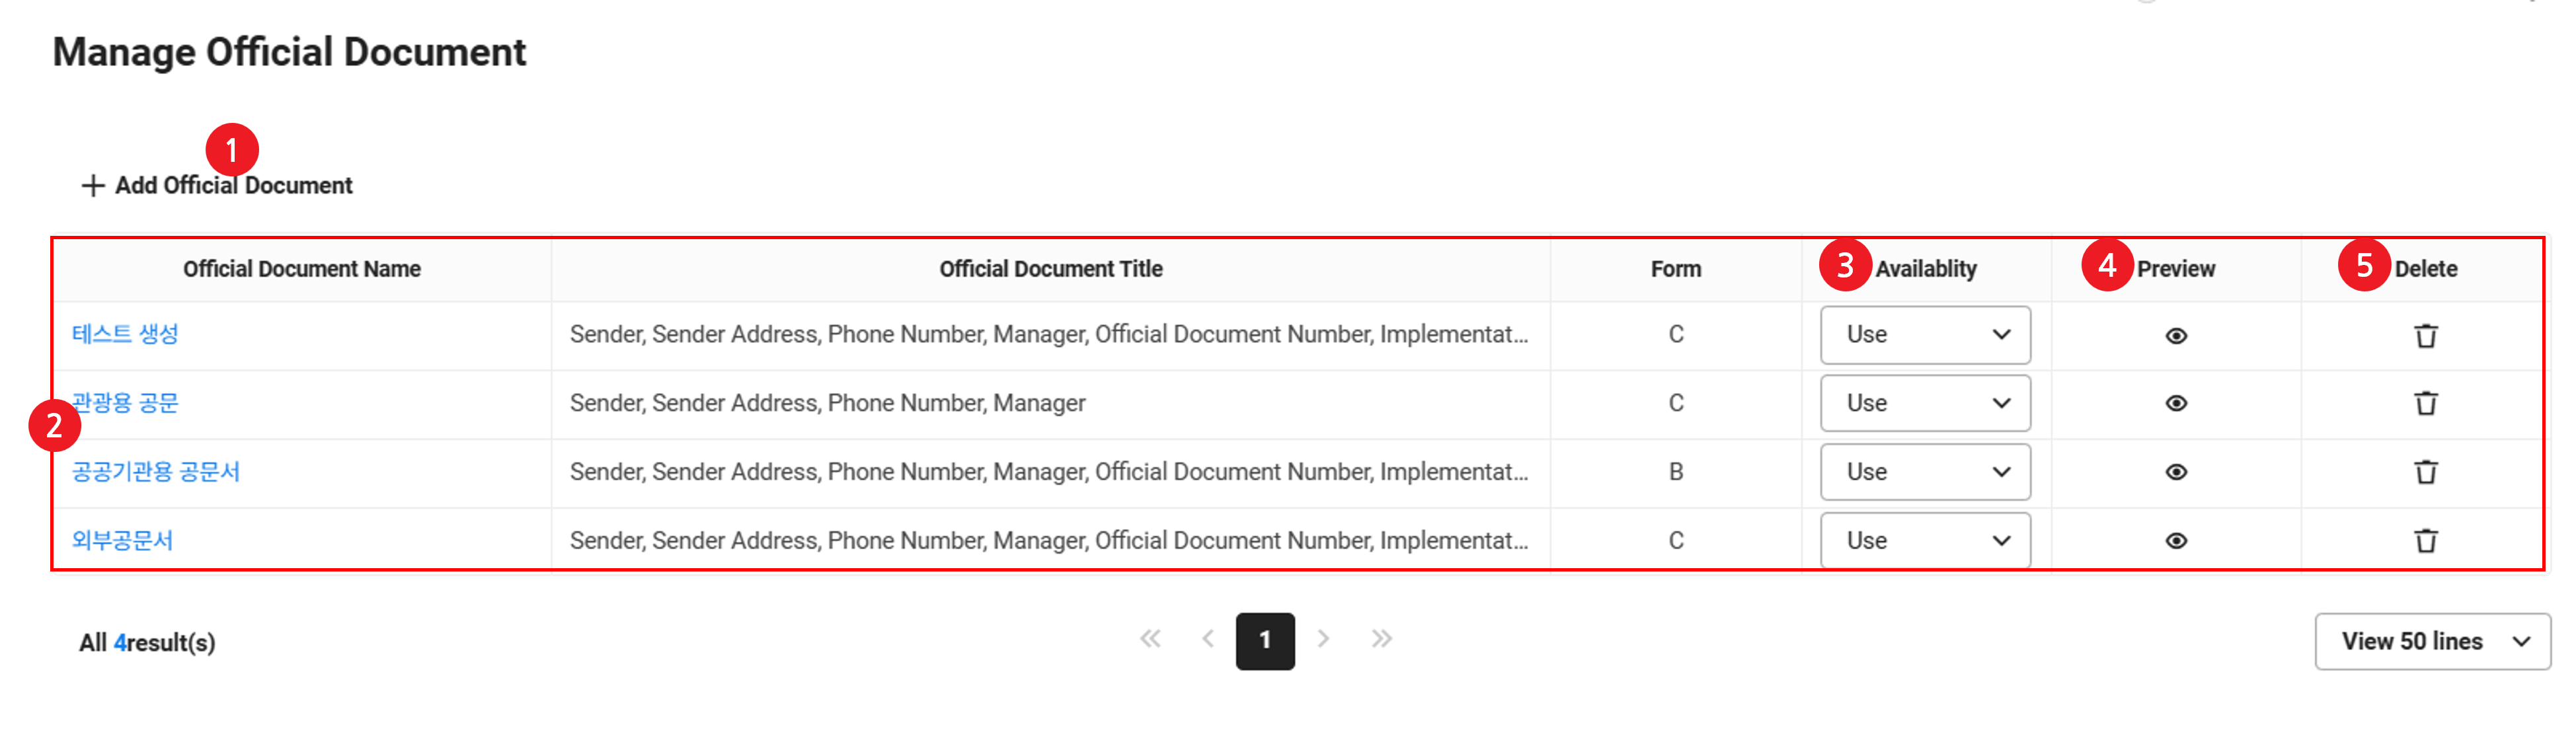
| Area | Description |
|---|---|
| ① Add Official Document | Add new official document forms (See Add Official Document Form) |
| ② List | Official document form list
|
| ③ Usage Status | Set usage status of official document forms |
| ④ Preview | Click to preview official document forms |
| ⑤ Delete | Delete Official Document Form |
Add Official Document Form
The following describes how to add an official document.
- Click the ‘Admin Menu’ at the top right of the PC web screen, and then click ‘Manage Approval’ in the pop-up window.
- Click
 at the top left of the screen.
 - Click ‘Official Document > Manage Official Document’ from the menu.
- Click ‘Add Official Document’.
- Configure the official document form.
- Official Document Name: Enter the name of the official document form.
- Official Document Title: You can select whether to provide the default official document title. Enter the title to provide it with if you want to provide a default title. When selecting ‘Document Title Unavailable for Edit’, the user can't edit the provided default title.
- Sending Official Letter Items: You can set items to display in the official document sending request form.
- Sending Information: When displaying the sending information, select the company information or a business place, and then select the detailed items to display. Selected sending information is displayed automatically in the Create Official Document Sending Request Form page of the user, and can't be edited by the user.
- If you select ‘Enter Manually’ and select detailed items to display, the user can manually enter them when creating the official document sending request form.
- Document Information: Select the document information to display.
- The document number is displayed on the official document upon completion of approval, depending on the form settings in the ‘Official Document Number’ item below.
- The implementation date is displayed automatically as the official document request date, and the user can edit it.
- Receipt Information: Select the receipt information to display.
- When selecting a recipient or reference, the detailed recipient information or detailed reference information is displayed.
- Seal Information: Select the display format of the company representative information. When selecting ‘Seal,’ the company seal is displayed on the official document if it has been registered in ‘Business Support Settings > Company Information > Manage Company Information’. You can set company-specific representative job titles.
- Others: Select whether to display the company logo. The company logo image is displayed if it has been registered in ‘Admin’.
- Sending Information: When displaying the sending information, select the company information or a business place, and then select the detailed items to display. Selected sending information is displayed automatically in the Create Official Document Sending Request Form page of the user, and can't be edited by the user.
- Format: Select the official document format style. Click 'Preview' to preview the format.
- Official Letter Basic Content: You can set the default text format of the official document.
- Official Document Number: Set the official document number format.
- Click 'Save' to save the public document formats you have added.
Edit Official Document Form
The following describes how to edit official document forms.
- Click the ‘Admin Menu’ at the top right of the PC web screen, and then click ‘Manage Approval’ in the pop-up window.
- Click at the top left of the screen.
- Click ‘Official Document > Manage Official Document’ from the menu.
- Click the title of the official document form you want to edit.
- Apply the edited content, and then click ‘Save’.
- The edited information is saved.
Delete Official Document Form
The following describes how to delete official document forms.
- Click the ‘Admin Menu’ at the top right of the PC web screen, and then click ‘Manage Approval’ in the pop-up window.
- Click at the top left of the screen.
- Click ‘Official Document > Manage Official Document’ from the menu.
- Click the delete icon of the official document form you want to edit.
- Click 'Save'.
- The official document form will be deleted.
- Forms with created official documents can't be deleted.
Official Document Request History
You can view the receipt and sending history of official documents. You can also search and view the request history by condition and download the list of official document receipt and sending requests as an Excel file.
Receipt History
The Official Document Receipt Request History page is laid out as follows.
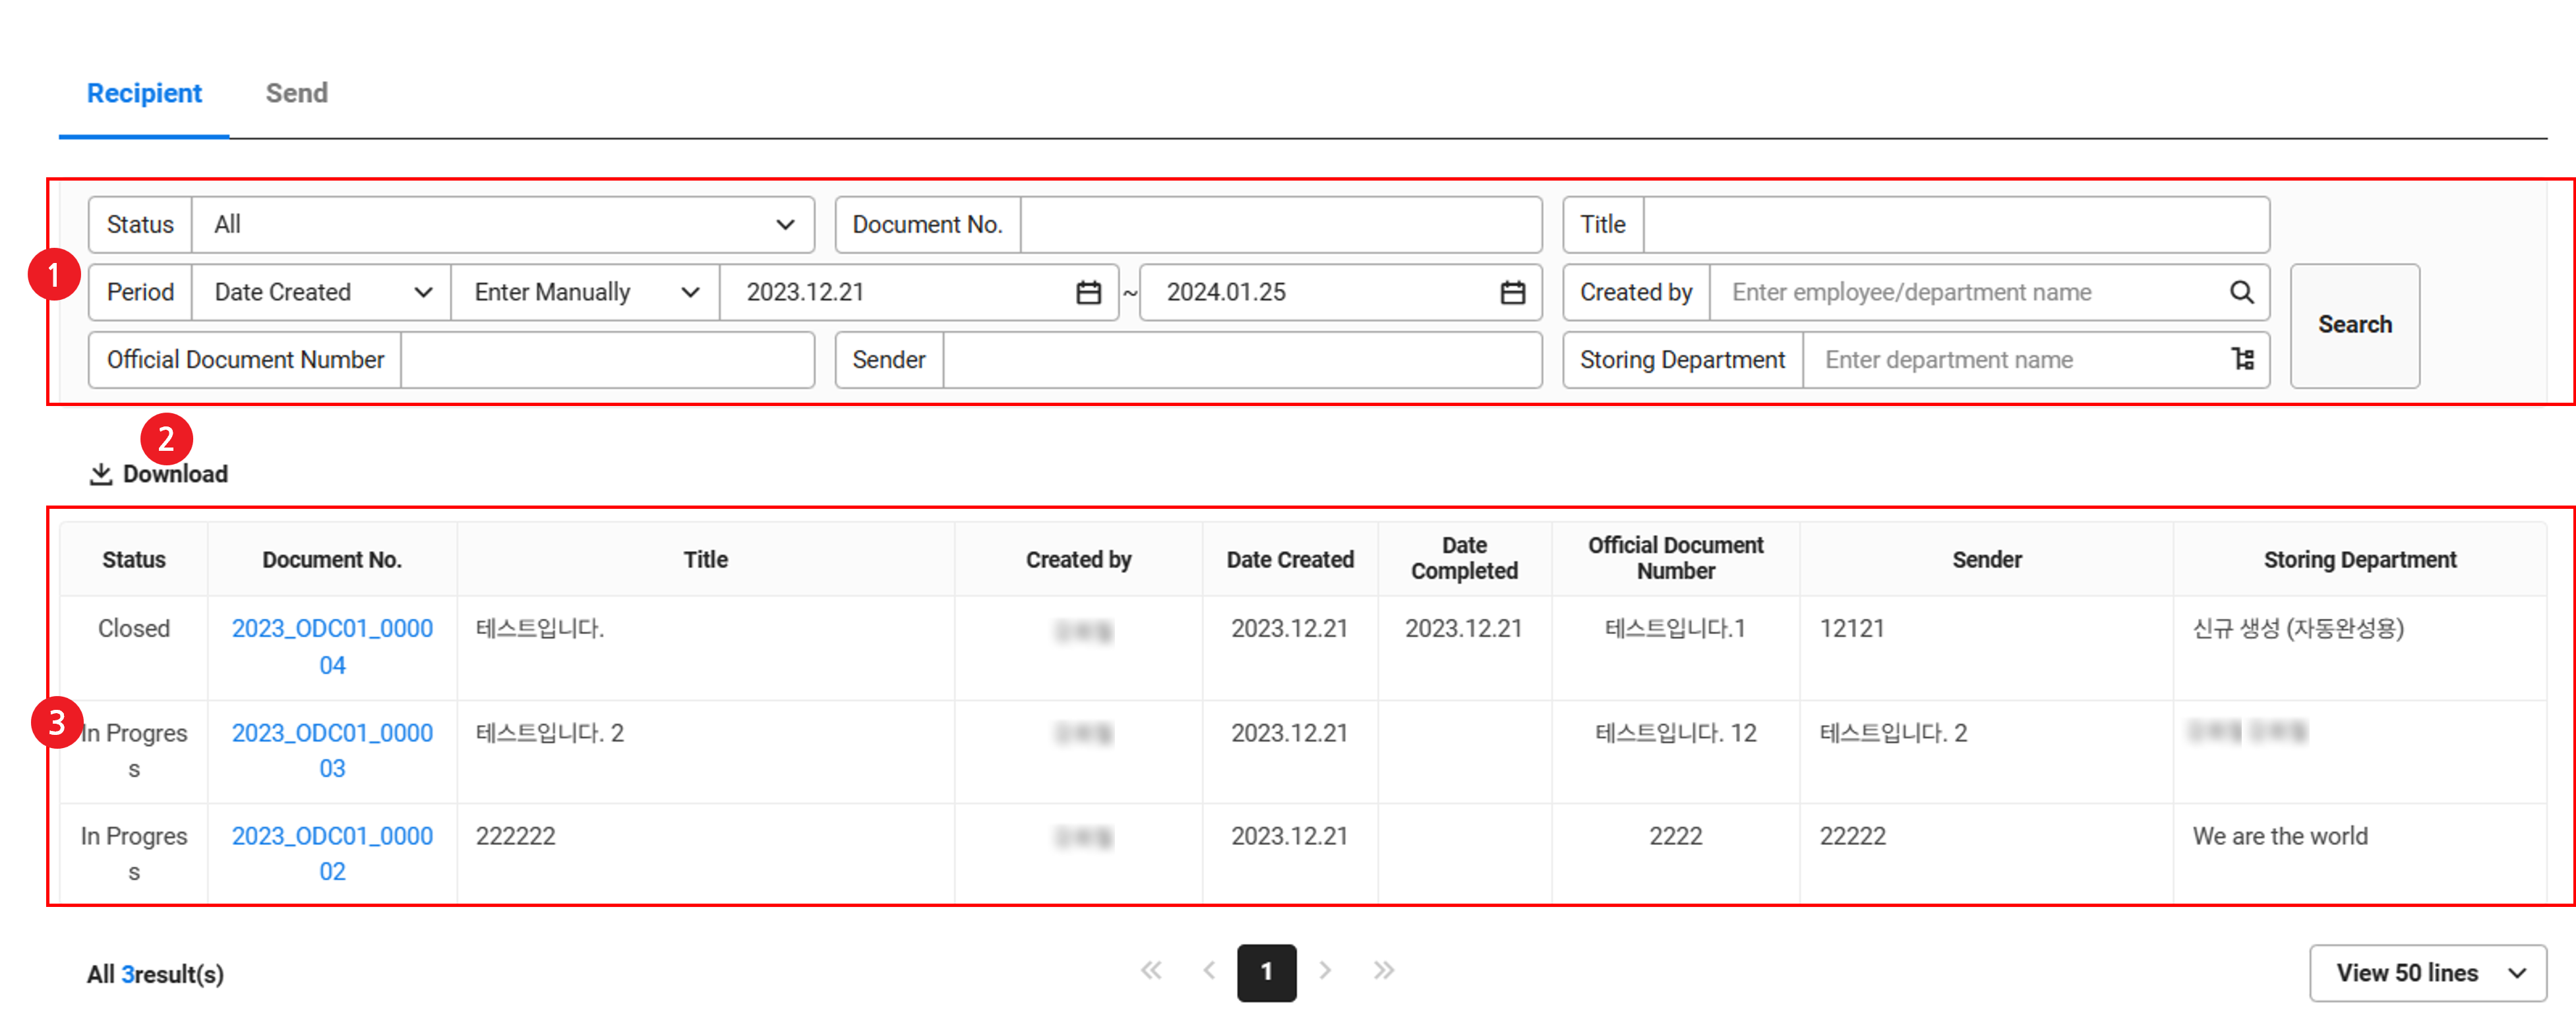
| Area | Description |
|---|---|
| ① Search window | Search the official document receipt request history based on status, document number, title, period, creator, official document number, sender, and storing department conditions |
| ② Download | Download the official document receipt request history as an Excel file (See Download Official Document Request List) |
| ③ Request list | Official document request list
|
Sending History
The Official Document Sending Request History page is laid out as follows.
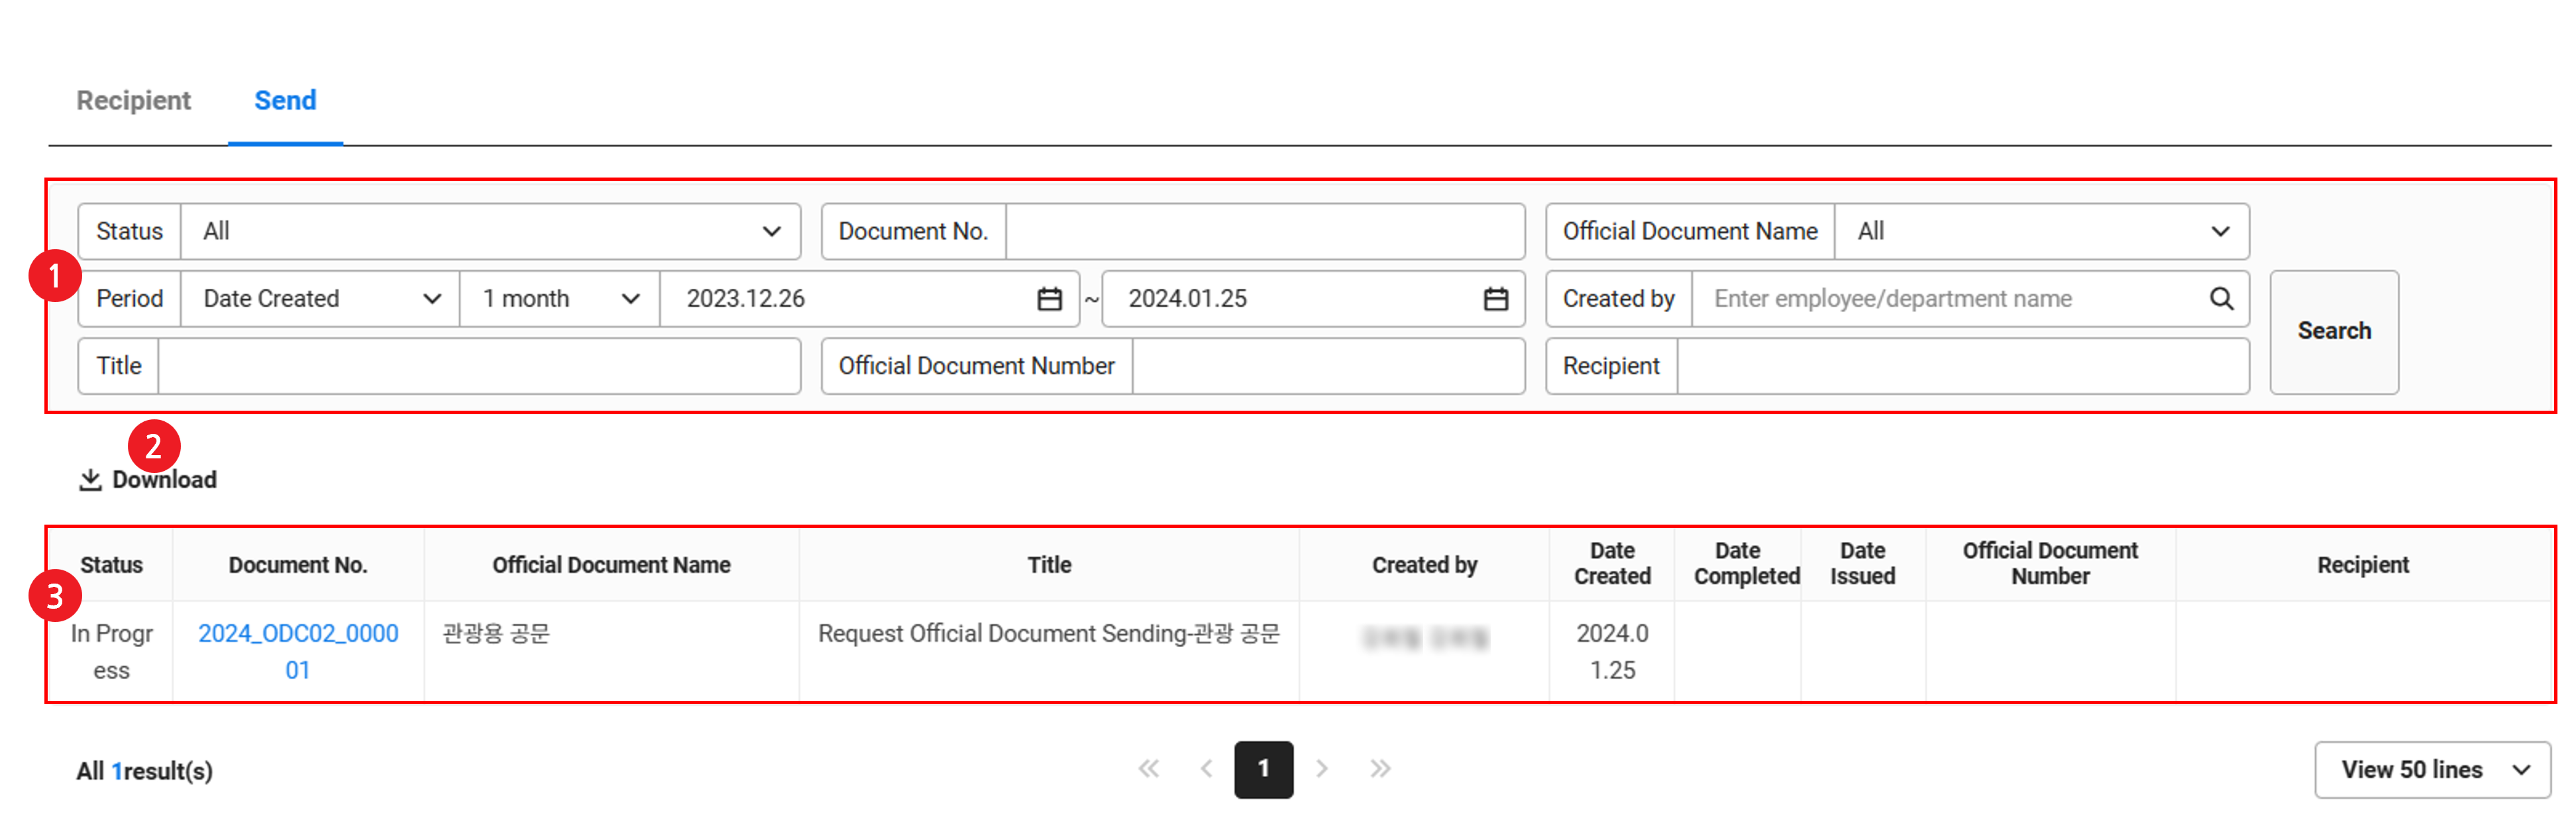
| Area | Description |
|---|---|
| ① Search window | Search the official document sending request history based on status, document number, official document name, period, creator, official document number, and recipient conditions |
| ② Download | Download the official document sending request history as an Excel file (See Download Official Document Request List) |
| ③ Request list | Official document sending request list
|
Download Official Document Request History
The following describes how to download the official document request history as an Excel file.
- Click the ‘Admin Menu’ at the top right of the PC web screen, and then click ‘Manage Approval’ in the pop-up window.
- Click at the top left of the screen.
- Click ‘Official Document > Official Document Request History’ from the menu.
- Select the tab you want to download.
- If necessary, enter the resource conditions to be searched in the search window, and then click ‘Search’.
- You can view the official documents corresponding to the entered conditions.
- Click ‘Download’.
- The official document request list is downloaded as an Excel file.
The downloaded file is saved as ‘history.xlsx’ in the Downloads folder.