This feature is available after applying for the Reservation option.
You can register and manage offices. You can also download the list of offices as an Excel file. Because resources can be registered after registration of the office, register offices first before registration of resources.
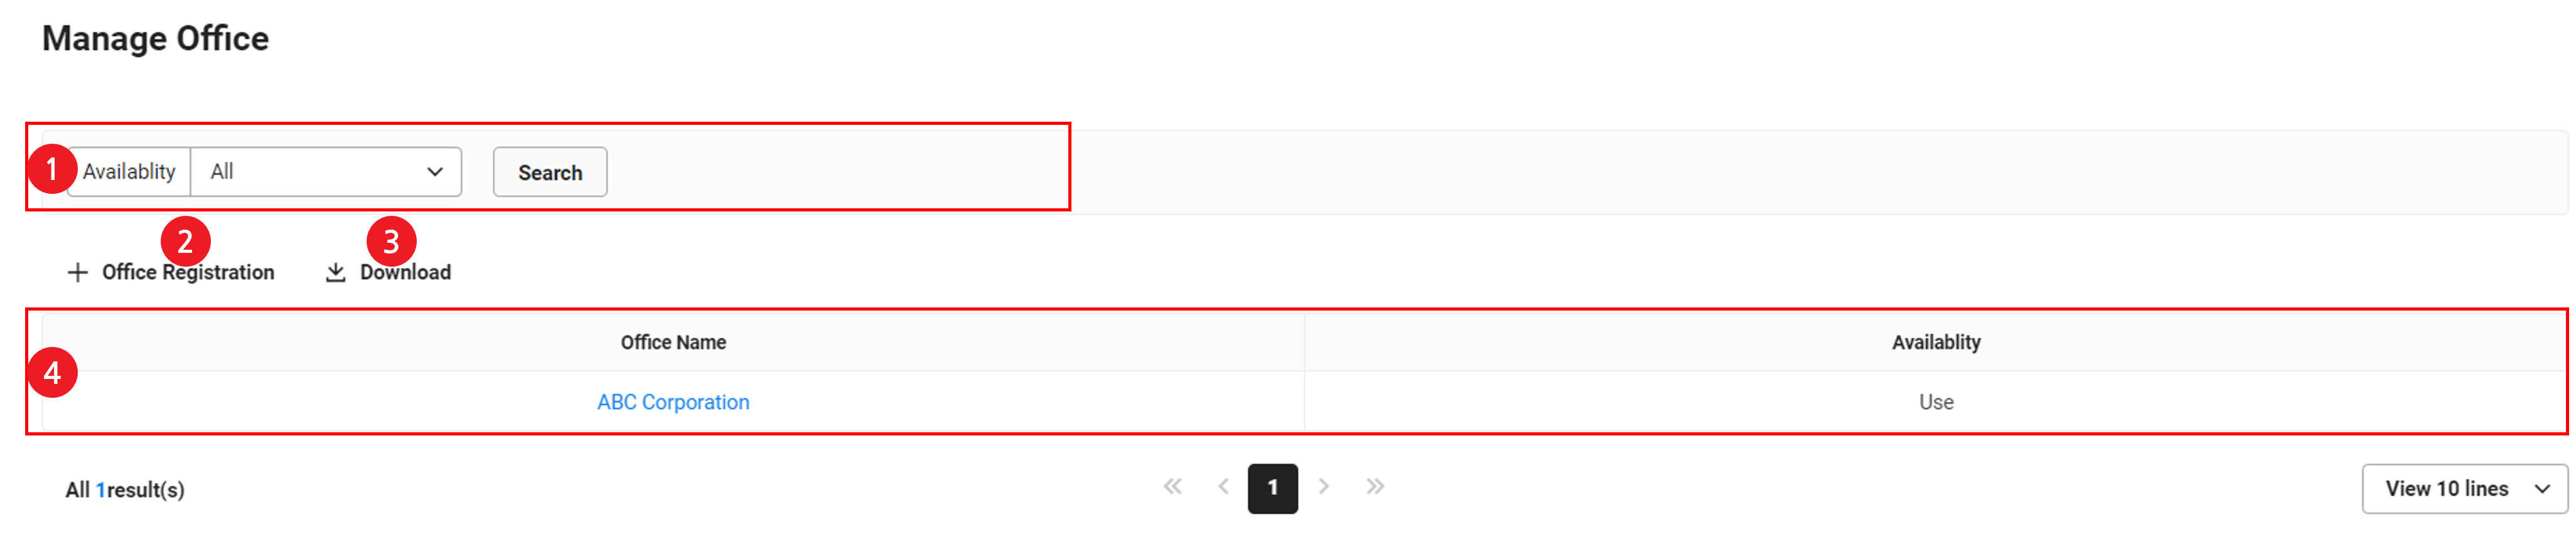
The Manage Office page is laid out as follows.
| Area | Description |
|---|---|
| ① Search | Search offices based on office name and usage status conditions |
| ② Register Office | Add a new office (See Add Office) |
| ③ Download | Download the office list as an Excel file |
| ④ Office list | It displays the office list
|
Add Office
The following describes how to add an office.
- Click ‘Admin Menu’ at the top right of the PC web screen, and then click ‘Manage Reservation’ in the pop-up window.
- Click
 at the top left of the screen.
 - Click 'Manage Office' from the menu.
- Click 'Register Office'.
- Enter the office information to be registered.
- Enter the office name.
- Enter the country.
- Select the time zone.
- Enter the priority for the list to be displayed.
- Select the usage status.
- Click ‘Save’.
- An office is added.
Edit Office
The following describes how to edit office information.
- Click ‘Admin Menu’ at the top right of the PC web screen, and then click ‘Manage Reservation’ in the pop-up window.
- Click at the top left of the screen.
- Click 'Manage Office' from the menu.
- Click the office name to view.
- Apply the content to be edited in the pop-up window.
- Click ‘Edit’.
- The office information is edited.
If a reservation exists for an office, the office name, country, and timezone information can't be edited. For an office with a reservation history, you can only edit its priority and usage status.
Delete Office
The following describes how to delete office information.
‘Delete’ is displayed only for unused offices.
- Click ‘Admin Menu’ at the top right of the PC web screen, and then click ‘Manage Reservation’ in the pop-up window.
- Click at the top left of the screen.
- Click 'Manage Office' from the menu.
- Click the office name to be deleted.
- Click ‘Delete’ in the pop-up window.
- The office information is deleted.