This feature is available after applying for WORKS Approval.
After registering the frequently used approval lines, recipient groups, and sharing groups, you can easily load and use them when creating approval documents. (See Create Approval Document)
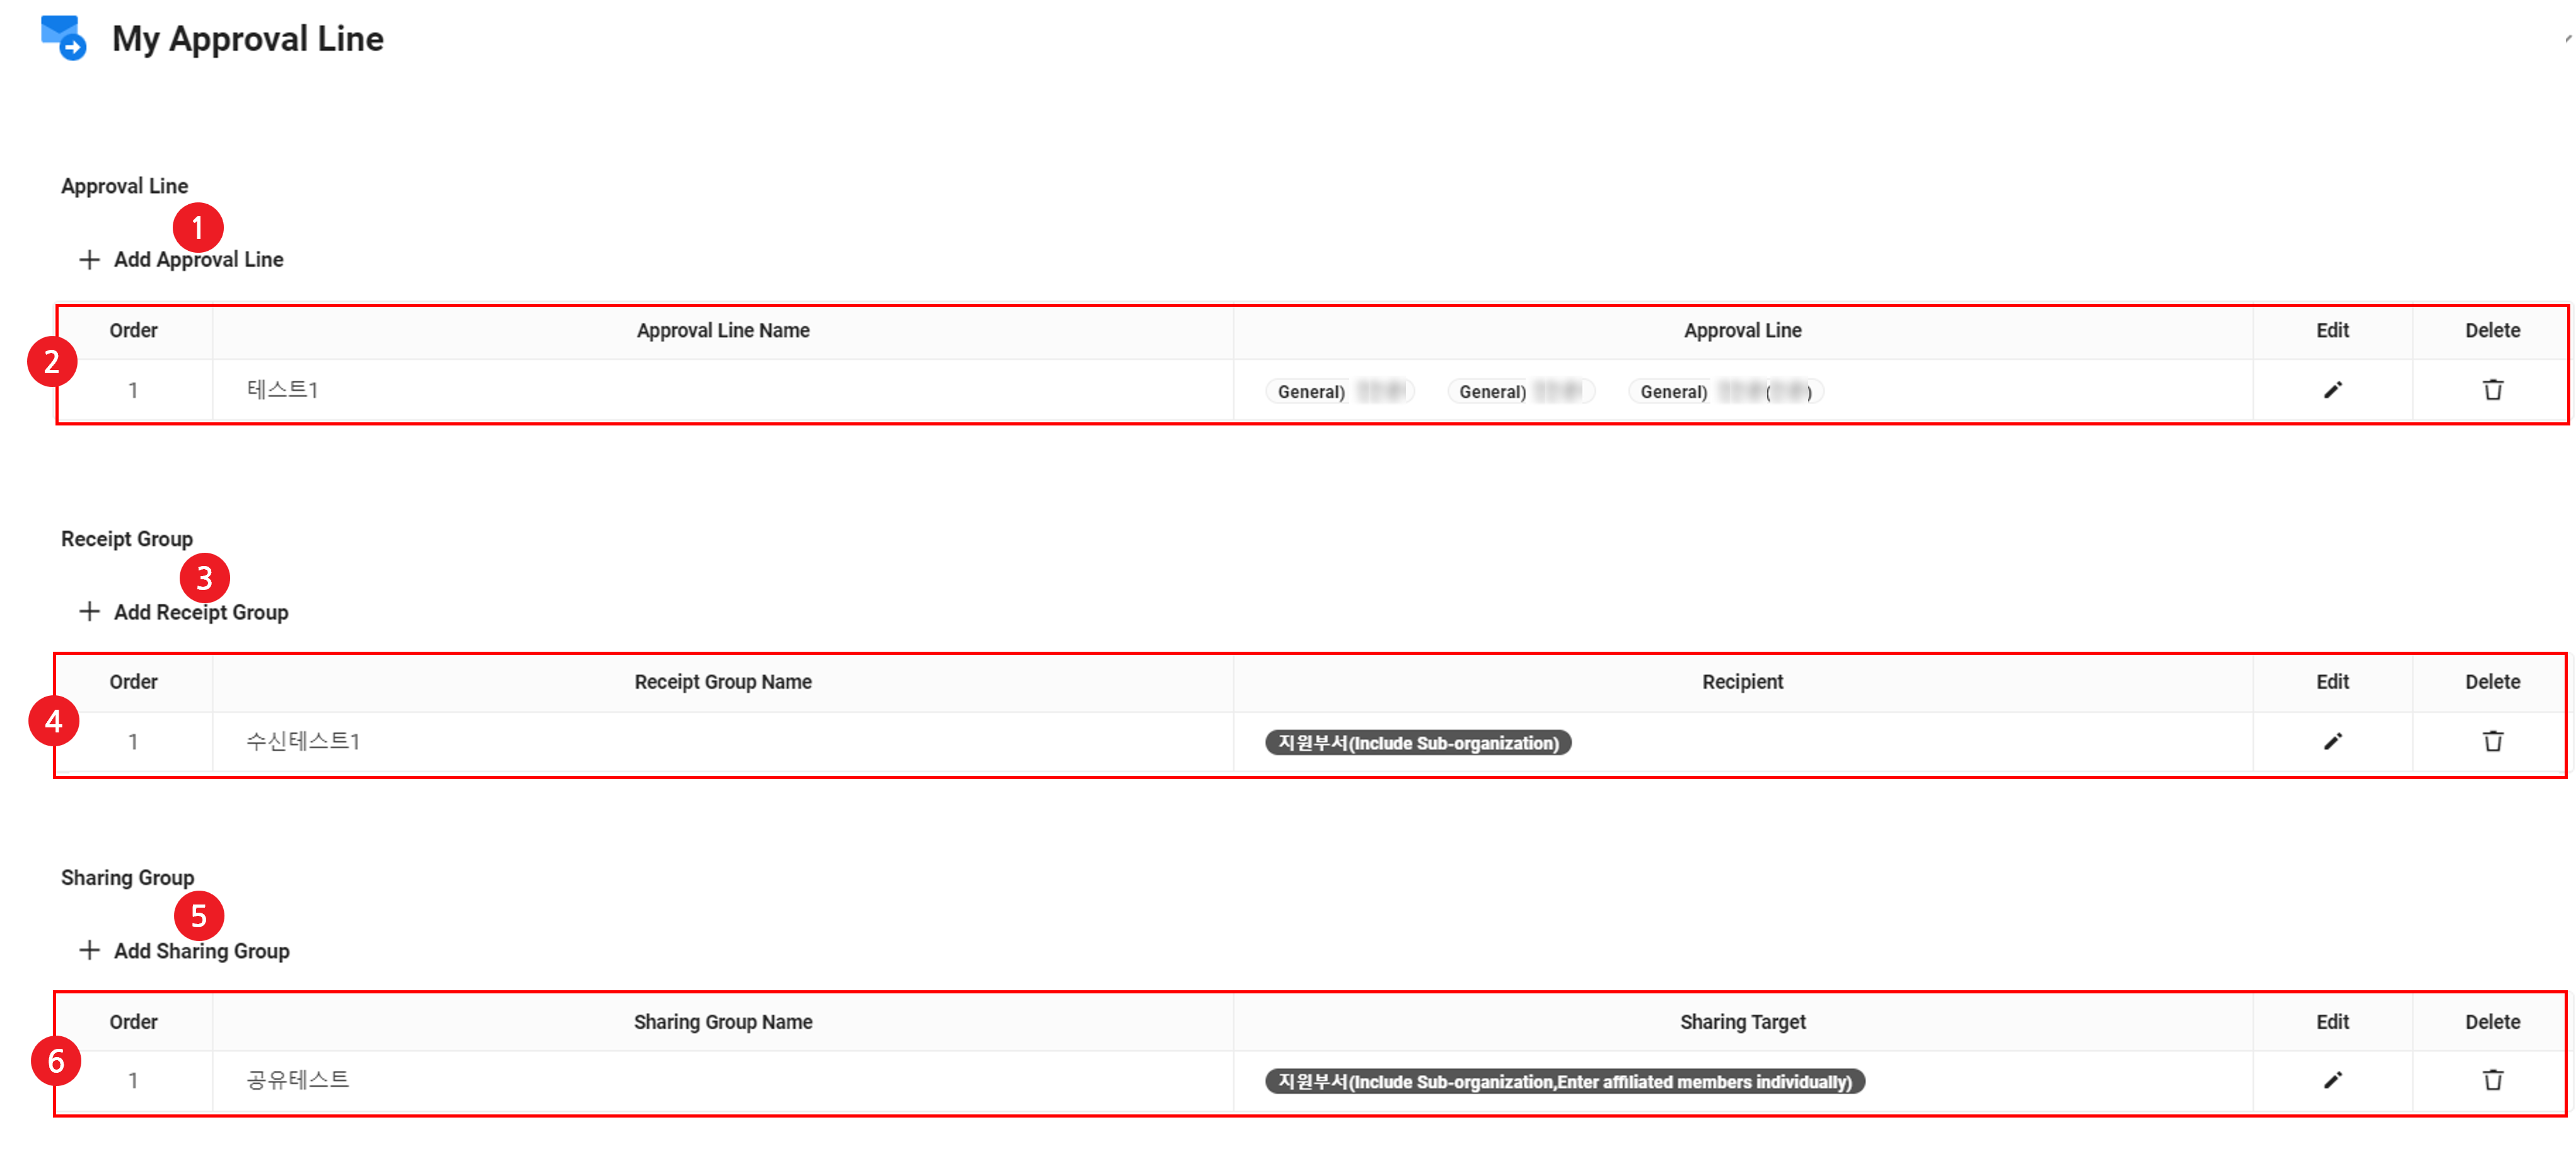
The My Approval Line page is laid out as follows.
| Area | Description |
|---|---|
| ① Add Approval Line | Click to add My Approval Line (See Add My Approval Line) |
| ② My Approval Line list | It displays the approval line list
|
| ③ Add Recipient Group | Click to add My Recipient Group (See Add My Recipient Group) |
| ④ My Recipient Group list | It displays the list of recipient groups
|
| ⑤ Add Sharing Group | Click to add My Sharing Group (See Add My Sharing Group) |
| ⑥ My Sharing Group list | It displays the list of sharing groups
|
Add My Approval Line
The following describes how to register my approval line.
- Click the
 icon at the top right of the PC web screen, and then click ‘Approval’ in the pop-up window.
 - Click
 at the top left of the screen.
 - Click ‘My Approval Line’ from the menu.
- Click ‘Add Approval Line’.
- Enter information in the Set Approval Line pop-up window, and click ‘OK’.
- Enter the approval line name.
- After clicking ‘Add’, select the approval type and approver. (See Detailed Descriptions of Approval Type and Approver)
- Approvers can be added as employees or departments. (See the Item 4 in Add Approval Line)
- The parallel approval (agreement) can be made up of multiple employees or departments, and the user can add parallel approvers as needed while creating documents.
- To delete a set approver, click
 .
. - If the approval type is Parallel Approval (Agreement), then deleting the approval type will delete all grouped parallel approvers.
- To add more approvers, click ‘Add’ and repeat the steps.
- The set approval lines are displayed in the My Approval Line list.
Add My Recipient Group
The following describes how to register my recipient group.
- Click the icon at the top right of the PC web screen, and then click ‘Approval’ in the pop-up window.
- Click at the top left of the screen.
- Click ‘My Approval Line’ from the menu.
- Click 'Add Recipient Group'.
- Enter information in the Set Recipient Group pop-up window, and click ‘OK’.
- Enter the recipient group name.
- Add the recipient. You can add recipients in the unit of departments or employees. You can add one or more departments or one or more employees.
- Department: All members of the selected department are recipients. If you select ‘Include suborganizations’, members of suborganizations are also included.
- Employee: Only the selected employees are recipients
- The set recipient groups are displayed in the My Recipient Group list.
Add My Sharing Group
The following describes how to register my sharing group.
- Click the icon at the top right of the PC web screen, and then click ‘Approval’ in the pop-up window.
- Click at the top left of the screen.
- Click ‘My Approval Line’ from the menu.
- Click 'Add Sharing Group'.
- Enter information in the Set Sharing Group pop-up window, and click ‘OK’.
- Enter the sharing group name.
- Select sharing targets. You can add sharing targets in the unit of departments or employees. You can add one or more departments or one or more employees.
- When you add a department unit, all members of the selected department become sharing targets
- Share in the unit of departments by default. If you select ‘Enter affiliated members individually’, you can individually share to affiliated members at the time of creation.
- If you select ‘Include suborganizations’, the members of suborganizations are included.
- When you add an employee unit, share with only the selected employee
- When you add a department unit, all members of the selected department become sharing targets
- The set sharing groups are displayed in the My Sharing Group list.