You can check the checklists that have been assigned to you. You can handle the assigned task within the specified period, and if the handler is the person in charge of the task, you can request a reminder.
‘Checklist’ is displayed only when there are checklists assigned to you. When a checklist is assigned to you, a notification email is sent to the email address registered on the employee information.
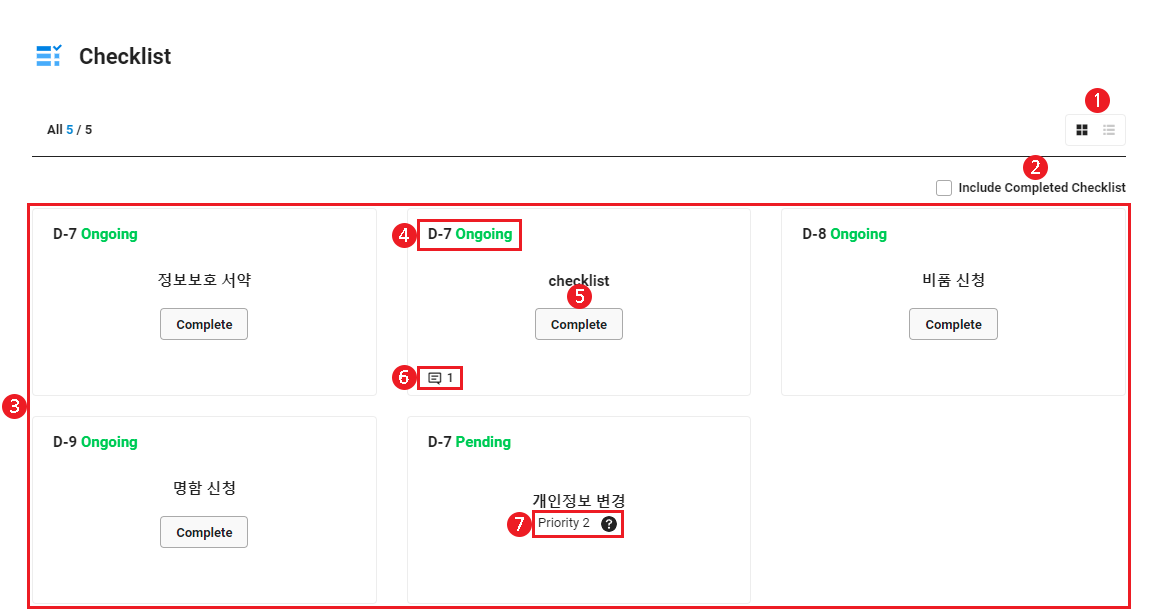
The Checklist screen is laid out as follows.
| Area | Screen |
|---|---|
| ① Change viewing method | It changes the viewing method of the checklist list.
|
| ② Include completed checklists | Click to display completed checklists in the list |
| ③ Checklist list | It displays the checklist list. |
| ④ Due date/Status | It displays the due dates and status of checklists.
|
| ⑤ Complete | Complete the checklist with user set as Processor (Complete Checklists) |
| ⑥ Comment | The number of comments is displayed if there are comments. |
| ⑦ Priority |
|
Search Checklist Details
Click the checklist card to view details if the view type is ![]() , and click the checklist name to view details if the view type is
, and click the checklist name to view details if the view type is ![]() .
.
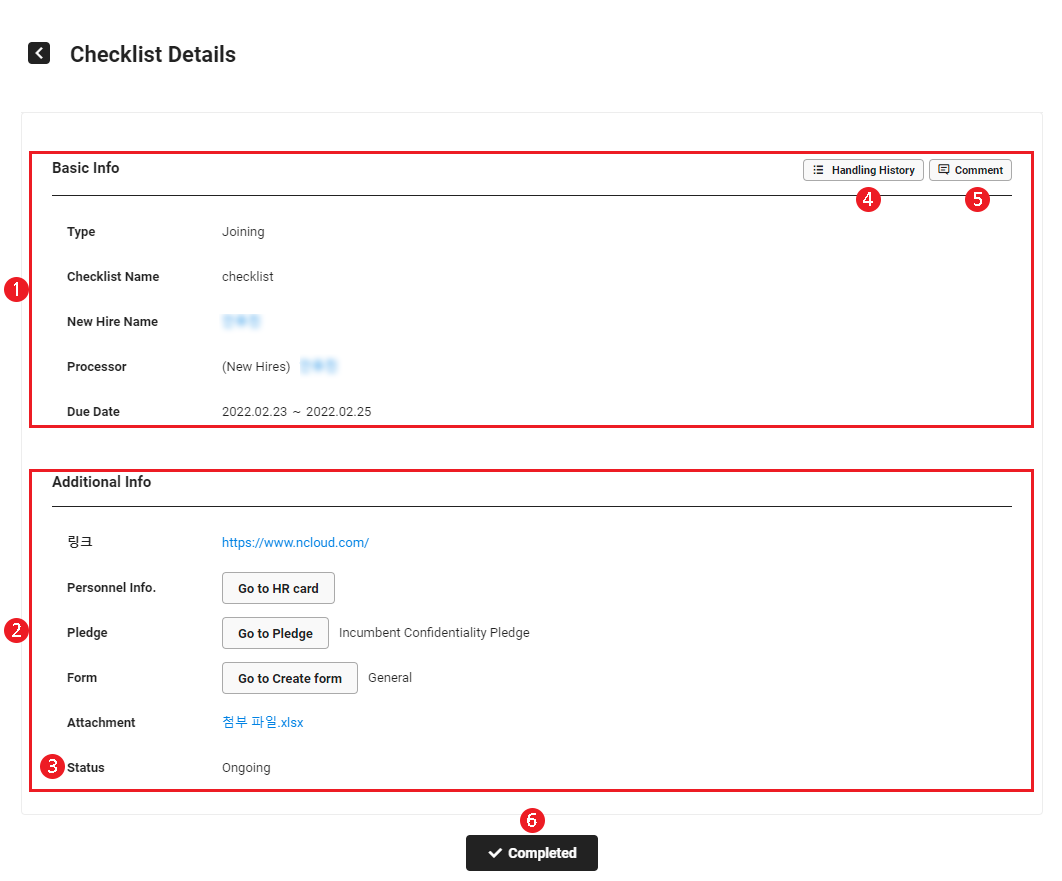
The Checklist Details screen is laid out as follows.
- The displayed items may differ according to the checklist settings configured by the admin. (Refer to Add Checklist)
| Area | Description |
|---|---|
| ① Basic information | Display basic checklist information (classification, checklist name, joined/resigned employee, processor, due date)
|
| ② Additional information | Show checklist’s additional information
|
| ③ Status | Displays checklist status
|
| ④ Process History | Displayed when the checklist is completed or the checklist was edited by the checklist admin. Click to assign, edit, request reminder and check completion history of the checklist. |
| ⑤ Comment | Click to add any questions or additional notices to be made by the person in charge of the task in the comments
|
| ⑥ Complete |
|
Complete Checklist
The following describes how to complete a checklist.
- Click the
 icon at the top right of the PC web screen, and then click ‘My Work’ in the pop-up window.
 - Click
 at the top left of the screen, and then click ‘Checklist’ from the menu.
 - Click on the checklist to complete.
- Click the checklist card to view details if the view type is
 . Click the checklist name to view details if the view type is
  .
.
- Click the checklist card to view details if the view type is
- Check the details for the checklist.
- Go to HR Card: Click to edit your HR information.
- Go to Pledge: Click to view pledges that require signature.
- To sign the pledge, click ‘Sign’.
- To print the pledge, click ‘Print’.
- Go to Create form: Click to see the approval forms to fill out. For more information on filling out the form, refer to Create Approval Documents.
- Click the attachment name to download the attachment.
- Click ‘Complete’.
- This completes the checklist.
If view type is ![]() , click ‘Complete’ on the checklist card to complete.
, click ‘Complete’ on the checklist card to complete.
If view type is ![]() , select the checklist to complete and click ‘Complete’ to complete.
, select the checklist to complete and click ‘Complete’ to complete.
Managing Joining/Retirement
You can check and close joining/retirement checklists assigned to you.
- The Manage Joining/Retirement menu is only displayed if you're set as the processor (person in charge of the task or department head) of the joining/retirement checklists. For more information joining/retirement checklist processor settings, refer to Joining/Retirement Checklist.
- For more information about checklists, refer to Checklist.
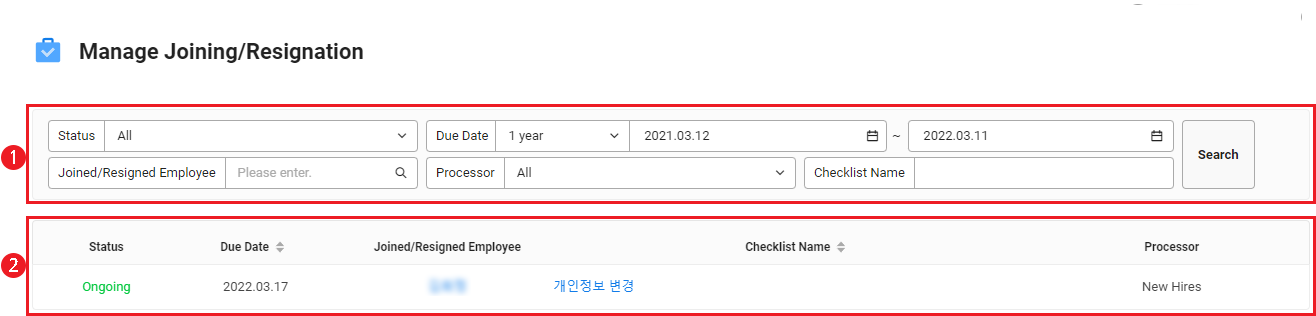
The Manage Joining/Retirement screen is laid out as follows.
| Area | Description |
|---|---|
| ① Search Window | Search checklists by status, due date, joined/retired employee, processor, and checklist name. |
| ② Checklist list | A list of checklists for which you are the person in charge of the task or department head
|