Home is the first page displayed when you log in to Business Support. The information to be checked quickly in Home by users are summarized and provided through widgets. Setting frequently used widgets to appear on your home screen allows you to view the information you need at a glance and manage your tasks.
Home
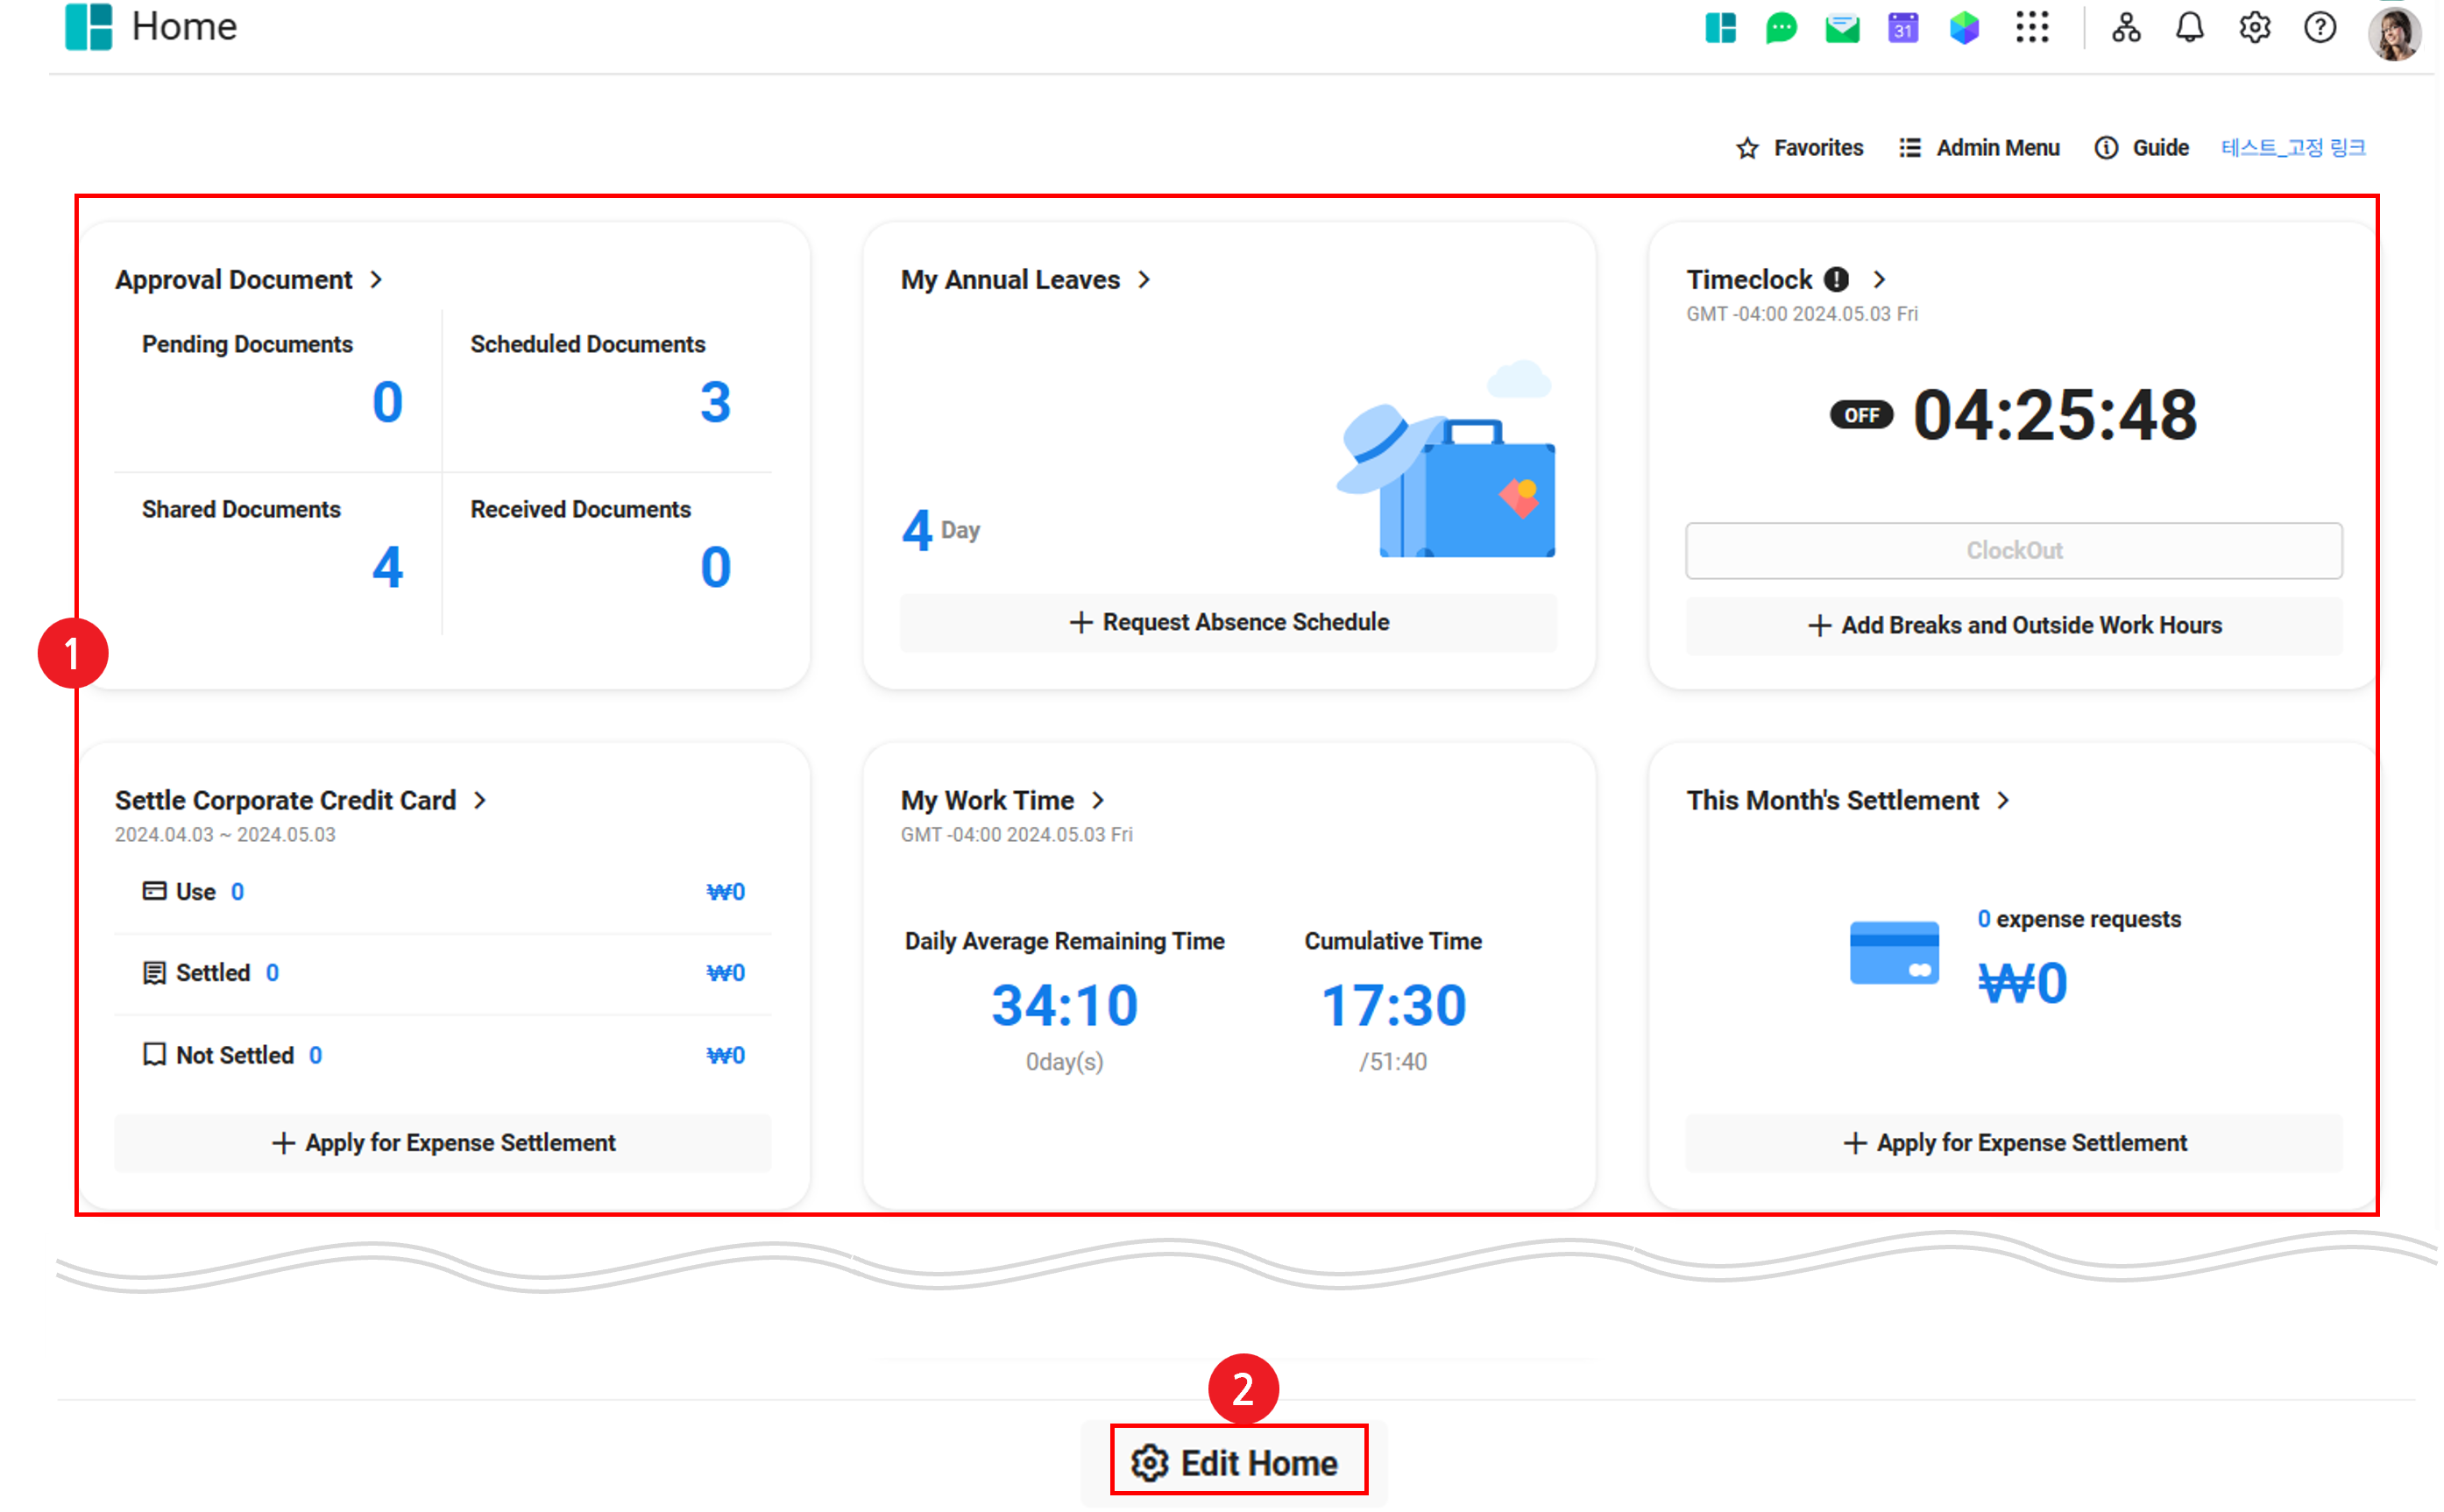
The Home page is laid out as follows.
| Area | Page |
|---|---|
| ① Widget area | It displays the list of widgets set to be displayed (See Detailed Descriptions of Widgets) |
| ② Edit Home | Click to edit widgets to be displayed in Home (See Edit Home) |
Detailed Descriptions of Widgets
The detailed descriptions of each widget displayed in Home page are as follows.
Depending on the product or service your company is using, or on your account or permissions, the widgets that are visible might be different for each user.
- Depending on the product or service you use:
- Using Approval only: Widgets are provided for ‘Approval Document’, ‘Organization Chart’, ‘Favorite Forms’ and ‘Recent Posts’
- Using Reservation: Widget is provided for ‘Today’s Reservations’
- Using Attendance: Widgets are provided for ‘Timeclock’, ‘My Annual Leaves’, ‘My Work Hours’, ‘Department Attendance Status’, and ‘Part-timer Status’
- Using Finance: Widgets are provided for 'This Month’s Settlement', 'Corporate Credit Card Settlement' (when using corporate card linkage), 'Expense Plan Not Settled', and 'Department Expense Status'
- Using NAVER WORKS Core Standard or higher: Widget is provided for 'Mail'
- Depending on your account:
- Work accounts: Widgets are provided only for ‘Approval Document’ and ‘Favorite Forms’
- Part-time accounts: Widget is provided for 'My Remaining Leaves'
- Depending on permissions:
- Widgets are provided for 'Department Attendance', 'Part-timer Status', and 'Department Expense Status' only to employees with permission
| Widget | Description |
|---|---|
| Approval Document | It displays the lists of approval documents and received documents
|
| Organization Chart | It displays the information of department members
|
| Clock-in/out | (When using the Attendance service) It displays the clock-in/out information
|
| My Annual Leaves | (When using the Attendance service) It displays the information of your remaining annual leaves (remaining leaves for part-time employees)
|
| My Work Hours | (When using the Attendance service) It displays your work hours (daily average remaining time, accumulated time during specified period)
|
| This Month's Settlement | (When using the Expense service) It displays your monthly settlement amount and number of items
|
| Corporate Credit Card Settlement | (When using the Expense service, employees using/possessing corporate credit cards) Displays your settled/unsettled corporate credit card information
|
| Expense Plan Not Settled | (When using the Expense service, when using expense plans) It displays your total unsettled expense plan amount and number of items
|
| Department Attendance Status | (When using Attendance and having Viewing Permissions) It displays the absence and work status of department members
|
| Part-timer Status | (If Viewing Permissions for Part-timer Status is in use) Displays the absence and work status of part-time employees
|
| Department Expense Status | (If Expense and Viewing Permissions are in use) Displays the total amount and number of expense settlements for the department
|
| Favorite Forms | It displays configured favorite forms
|
| Today's Reservations | (If Reservation service is in use) Display today’s reservation status (including reservations where you are a participant) and favorite resources
|
| Recent Posts | Display a list of posts by latest
|
Display mailing lists (when using NAVER WORKS Core Standard or higher)
|
|
| Today's Schedule | Show events you've registered for on Calendar
|
- It may take some time to reflect the latest information by service to widgets provided in Home.
- When viewing widgets in large mode, you can use pagination at the bottom to view up to 50 items for 'Approval Document', 'Recent Posts', and 'Mail' widgets
Clock-in/out Widget
If the company sets to use Attendance service and the work arrangement is specified, then you can check the clock-in/out from the Clock-in/out widget.
If the work arrangement is not specified, contact the Attendance Admin and after being assigned a work arrangement, you can then check the clock-in/out. Employees who use Select a Set Time to Clock-in/out (‘Report Approval of Work Schedule’) cannot check their clock-in/out unless they register their work schedule. (See Add Work Schedule)
When the Clock-in/out Records (Check Time) are Displayed Differently from the Work Hours
- In compliance with the Korean Labor Standards Act, work hours outside of the regular schedule are only recognized as work hours if it is directed and approved by the employer.
- Hours entered before the normal start time or after the normal end time for the day set in the work arrangement will only count as overtime if they are approved with the Create Work Result Request Form.
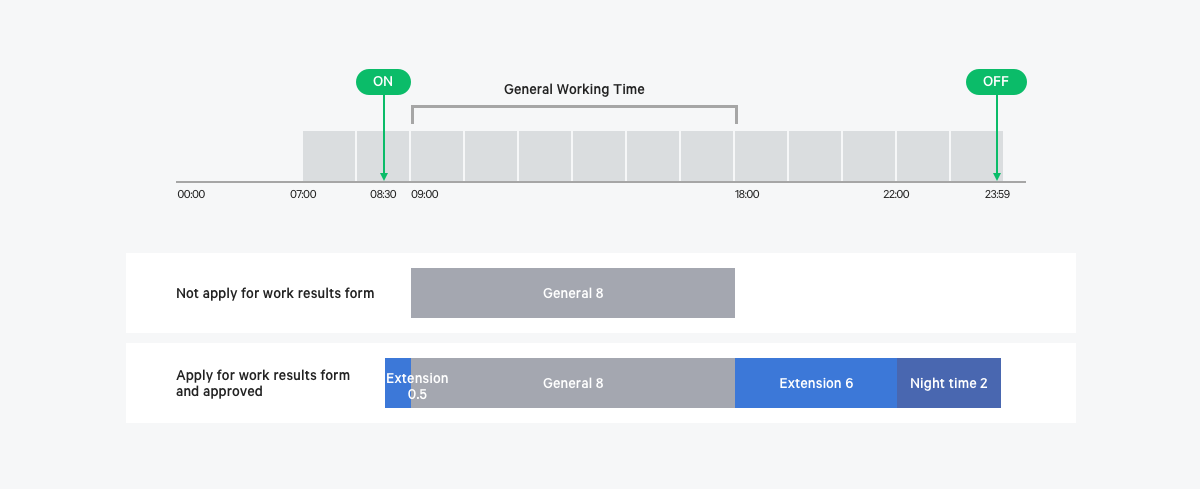
<Example>
A company where you work at a fixed schedule, clocking in at 9:00 AM and clocking out at 6:00 PM.- Even if an employee arrives at 8:30 AM and clocks in (clicks ‘ON’), the 30 minutes prior to 9:00 AM, when general work hours begin, is not recognized as valid work hours unless work result request is approved.
- Even if an employee works past general work hours until 12:00 AM (midnight) and clocks out (clicks ‘OFF’), the time after 6:00 PM, when general work hours end, is not recognized as valid work hours unless work result request was approved. (Night hour records are not recognized as valid either.)
- In the above case, if the work result request is approved, 30 minutes in the morning and 6 hours in the evening are recorded as extended work hours. In addition, if the night work start time set by the company is 10:00 PM, extended (night) work hours of 2 hours are also recorded.
Clock-in/out Cards by Situation
The clock-in/out card is differently displayed, depending on the situation. The Clock-in/out check page, depending on each situation is as follows.
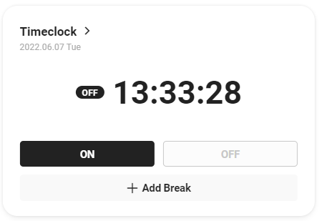
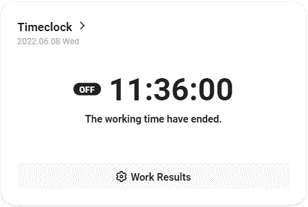
When the Clock-in/out Check Method Is ‘Once a Day’
Only the clock-in (‘ON’) button is displayed. After checking the clock-in, only the clock-out (‘OFF’) button is displayed, and the clock-out time is automatically calculated as the general work hour end time.
- Before Clock-in Check
- After Clock-in Check
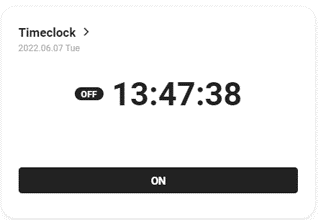
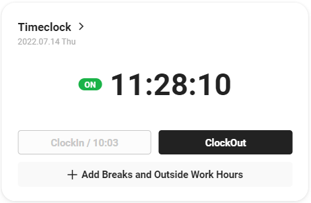
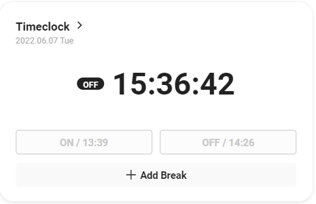
When the Clock-in/out Check Method Is ‘Twice a Day’
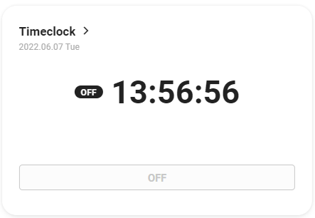
Both the activated clock-in (‘ON’) button and deactivated clock-out (‘OFF’) button are displayed. After checking the clock-in, the clock-in time is displayed below the ‘ON’ button, and the ‘OFF’ button is activated. The ‘OFF’ button is displayed until the following day's ‘ON’ button is activated.
- Before Clock-in Check
- After Clock-in Check
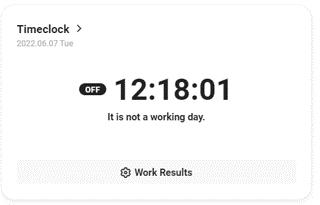
When It Is Not a Workday
- On days marked as holidays or days off in the user’s individual work schedule, the clock-in/out button is not displayed. If you worked on a holiday, then Create Work Result Request Form.
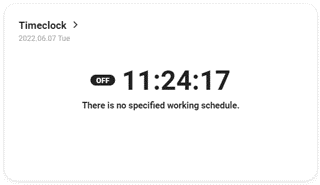
When the Work Arrangement Is Not Registered
- For employees whose work arrangement is not specified, the Attendance admin can check the clock-in/out after specifying the work arrangement.
When the Clock-in/Out Is Not Checked
- For Clock-in/out at a Fixed Time method, if you do not check the clock-in by the end of general work end time for that day, you can't check the clock-in/out for that day (today). You must Create Work Result Request Form and get it approved for it to be recognized as valid work hours.
When Clock-in/out Time or Work Hours Are Entered by the Attendance Admin
- If the Attendance admin enters the clock-in/out or work hours instead, then the clock-in/out button is deactivated.
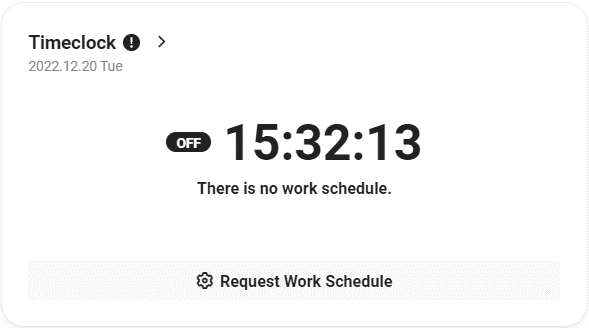
When the Work Schedule Is Not Registered
- Employees who use the ‘Report Approval of Work Schedule’ method of Select a Set Time to Clock-in/out or Flexible Clock-in/out can't check their clock-in/out if they don't have work schedule on the day of the clock-in/out check. Clock-in/out checks are available once you request your work schedule and get it approved. (See Add Work Schedule)
Clock-in/out Check
Depending on the check method, only clock-in is checked or both clock-in and clock-out are checked.
- The display start time of the ‘ON’ button is determined by the employee's work arrangement (e.g. By work arrangement, immediately after/30 minutes before/60 minutes before/90 minutes before/120 minutes before the general work start time). If the work arrangement is Flexible Clock-in/out, then ‘ON’ is displayed immediately after the set work start time on the applicable day.
- In the Clock-in/out at a Fixed Time and Select a Set Time to Clock-in/out methods, if late clock-ins are used according to the work arrangement settings, you can record late clock-ins.
- When clocking in after the general work hours, it is recorded as a late clock-in.
- For the late clock-in, you can't enter the clock-in time with a time earlier than the current time.
- If an employee has enabled clock-in notifications in Set Notifications, they'll receive a notification if they haven’t clocked-in by the set time. (Clock-in reminders aren't delivered on holidays/nonwork days due to shift settings.)
- If the work arrangement is Clock-in/out at a Fixed Time and a time unit absence or morning half day off is used, then the late clock-in status is not recorded.
- In the Flexible Clock-in/out method, if you use Compliance With Mandatory Work Hours according to the work arrangement settings, you can record the compliance with mandatory work hours.
- If you clock in later than set mandatory work start time or clock out earlier than set mandatory work end time, then it may be recorded as Noncompliance.
- You can't enter the clock-in time before the mandatory work start time in the case of noncompliance with mandatory work hours.
- If an employee has clocked-in (mandatory work start time) or clocked-out (mandatory work end time) notifications set inSet Notifications, they'll receive a notification if they haven’t clocked-in/out by the set time.
- When an absence is used, the mandatory work hour compliance status is not recorded.
- If you clocked-in and out at a fixed time, selected a set time to clock-in/out, and work past your quitting time, you'll need to Create Work Result Request Formand have it approved to have your hours reflected as overtime and night work hours. However, if the night work hours are set by the company for the work arrangement as general work hours, then they are reflected as night work hours even if the Create Work Result Request Form is not filled out.
- With the Flexible Clock-in/out method, if an employee works during the night work hours set by the company, then they must fill out the Create Work Result Request Form and have it approved for the hours worked to be recognized as night work hours.
Check Once a Day (Check Clock-in Only)
If the clock-in/out check method is Once a Day, then you can clock in/out as follows.
- Click the 'ON' button on the Clock-in/out Widget.
- Enter the clock-in time on the View Details page.
- Today’s date is displayed as the Base Date.
- By default, ‘Today’ is based on the general work hour start time of the base date.
- If an employee with Clock-in/out at a Fixed Time work arrangement does not clock in until the general work hour end time on a workday, then it is considered an absence and ‘ON’ disappears. In such case, the employee must Create Work Result Request Form and get it approved for it to be reflected as clock-in/out time.
- For employees whose work arrangement is Select a Set Time to Clock-in/out, the work hour selection area is displayed.
- The work hours are set by the Attendance admin, and employees can select one among set hours. If you clock in later than all of the set clock-in hours, then you can only select the latest hours. However, if the Attendance admin has set the work arrangement so that the work hours can be selected regardless of the clock-in time, arbitrary work hours can be selected.
- Employees applicable for the ‘Report Approval of Work Schedule’ method can request their work schedules by selecting from work hour slots set by the admin. The work hour slot requested by the user is selected and displayed automatically in the Clock-in/out Check page, and it can't be edited.
- Enter the clock-in time in the Clock-in field.
- You can select a clock-in date from the previous date, current date, and following date as of today. If you clocked in last night for urgent work and worked continuously until the next day's regular work hours, or if you work overtime after midnight, then select and enter the clock-in date.
- The clock-in time is displayed as the time when the ‘ON’ button was clicked (hereinafter referred to as the current time), but it can be changed to an earlier or later time. However, if the Attendance admin didn’t allow changing clock-in time in the work arrangement, then the clock-in time is recorded based on company’s standard server time and can't be changed.
- When clocking in late, you can only enter time after the current time.
- Work Location field can be displayed according to the work arrangement settings. Select a work location for the base date among work locations set by the company. If necessary, you can edit the work location from the Clock-in/out Status menu within the allowed period to change work hours set by the company.
- The Absence Item is displayed when there is an absence schedule added up to the work hours requested by the user on the base date. If there are various absences in a day, then it is displayed by also adding up the base work hours (standard work hours in case of Flexible Clock-in/out).
- Break and Outside Work fields can be displayed according to the work arrangement settings. You can enter additional break hours in addition to the break hours granted by default or add outside work hours.
- The break hours additionally entered between clock-in/out records are deducted (-) from the total work hours on the base date.
- The outside work hours additionally entered before or after the clock-in/out records are added up (+) to the total work hours on the base date.
- If you're clocked in and out at a set time, any time entered before your regular start time or after your regular end time will only count as overtime if it's approved by completing a Create Work Result Request Form.
- If the break time is granted in proportion to work hours, then break time is not automatically calculated for outside work hours that were entered additionally. Therefore, hours excluding break time must be entered or break time must be added separately.
- Today’s date is displayed as the Base Date.
- Click 'OK’.
- The clock-in is completed, and the ‘OFF’ button on the clock-in/out card will be deactivated.
Check Twice a Day (Clock-in)
If the clock-in/out check method is Check Twice a Day, then you can clock in as follows.
- Click the 'ON' button on the Clock-in/out Widget.
- Enter the clock-in time on the View Details page.
- For more information on each item, see Check Once a Day (Check Clock-in Only).
- Employees whose work arrangement is Flexible Clock-in/out can enter a clock-in time before the clock-in (‘ON’) button is activated the following day.
- Click 'OK’.
- ‘ON’ is deactivated, and ‘OFF’ is activated.
- Clock-in time is displayed under the 'ON' button
Check Twice a Day (Clock-out)
If the clock-in/out check method is Check Twice a Day, then you can clock out as follows.
- Click the 'OFF' button on the Commute widget in Home.
- Enter the clock-out time on the View Details page.
- You can't enter a time later that current time as a clock-out time.
- The work hours can't be calculated unless you check the clock-out. Employees who left work without clocking out must Create Work Result Request Form and get it approved for it to be recognized as valid work hours.
- If you register a clock-out result on the night before the base date or the early morning after the base date, then select the date and then enter the time.
- Work Location field can be displayed according to the work arrangement settings. You can enter a work location for the base date among work locations set by the company, or edit the work location entered upon clock-in check.
- The Absence Item is displayed when there is an absence schedule added up to the work hours requested by the user on the base date. If there are various absences in a day, then it is displayed by also adding up the base work hours (standard work hours in case of Flexible Clock-in/out).
- Break and Outside Work fields can be displayed according to the work arrangement settings. You can enter additional break hours in addition to the break hours granted by default or add outside work hours.
- If you're clocked in and out at a set time, any time entered before your regular start time or after your regular end time will only count as overtime if it's approved by completing a Create Work Result Request Form.
- If the work arrangement is Flexible Clock-in/out, then the general work hour end time is not separately specified. In this case, the entered outside work hours are all added up to the general work hours. However, if all base work hours are filled within the settlement period, it will be recorded as Overtime upon approval.
- If the break time is granted in proportion to work hours, then break time is not automatically calculated for outside work hours that were entered additionally. Therefore, hours excluding break time must be entered or break time must be added separately.
- If you use an early clock-out according to the Set Work Arrangement, then clocking-out before the general work hours are filled will be recorded as an early clock-out.
- If the work arrangement is Clock-in/out at a Fixed Time and a time unit absence or afternoon half day off is used, then the status of early clock-out is not recorded.
- If an employee enables clock-out notifications in Set Notifications and does not clock out until the set time, then they will receive a notification.
- If clicking the (‘OFF’) button directly leads to you to the Work Result Request Form, then the option whether to use the Work Result Request Form is provided if the base work hours within the settlement period have been exceeded when using the Flexible Clock-in/out work arrangement.
- When the base work hours are exceeded within the settlement period and the Work Result Request is not approved, they will not be recognized as work hours even if the clock-in/out times are recorded.
- The connection time of the work result request form may vary, depending on the selection status of Include Absence Hours during the base work hours set in work arrangement settings. (See Manage Work Arrangement)
Reset Today's Clock-in Time
You can reset the clock-in record of that day when clocking out, so that you can redo the clock-in check.
The following describes how to reset today's clock-in time.
- When checking clock-out, click ‘Reset’ from the View Details pop-up window. When you run the reset, the entered clock-in time is reset. However, you can't reset them in the following cases (including ‘Reset’ not being displayed)
- If the work result request form has been filled out for that day
- If you selected ‘Consider as having worked during entered hours even if clock-in/out times are missing’ in Work Arrangement
- If you've selected ‘Not allow’ in ‘Time Change’ in work arrangement
- You can reset all clock-in/out times in My Work > Manage Attendance > Clock-in/out Status.
When you reset the clock-in/out information, then absence hours registered for that date are also reset. If you don't enter the clock-in/out times after resetting them, they won't be reflected to work hours.
Edit Home
You can set which widgets appear in Home. You can also change the order of displayed widgets.
- Widgets that the Admin has set to ‘Use’ and ‘Required’ in Business Support Settings can't be turned off by users. (See Manage Home Screen ). Items that the Admin has set to ‘Not required’ can be individually added or deleted to Home by users.
- Edit Home is not provided for business accounts and part-time employees.
- Depending on the service in use and the permissions that have been granted, the widgets provided may vary.
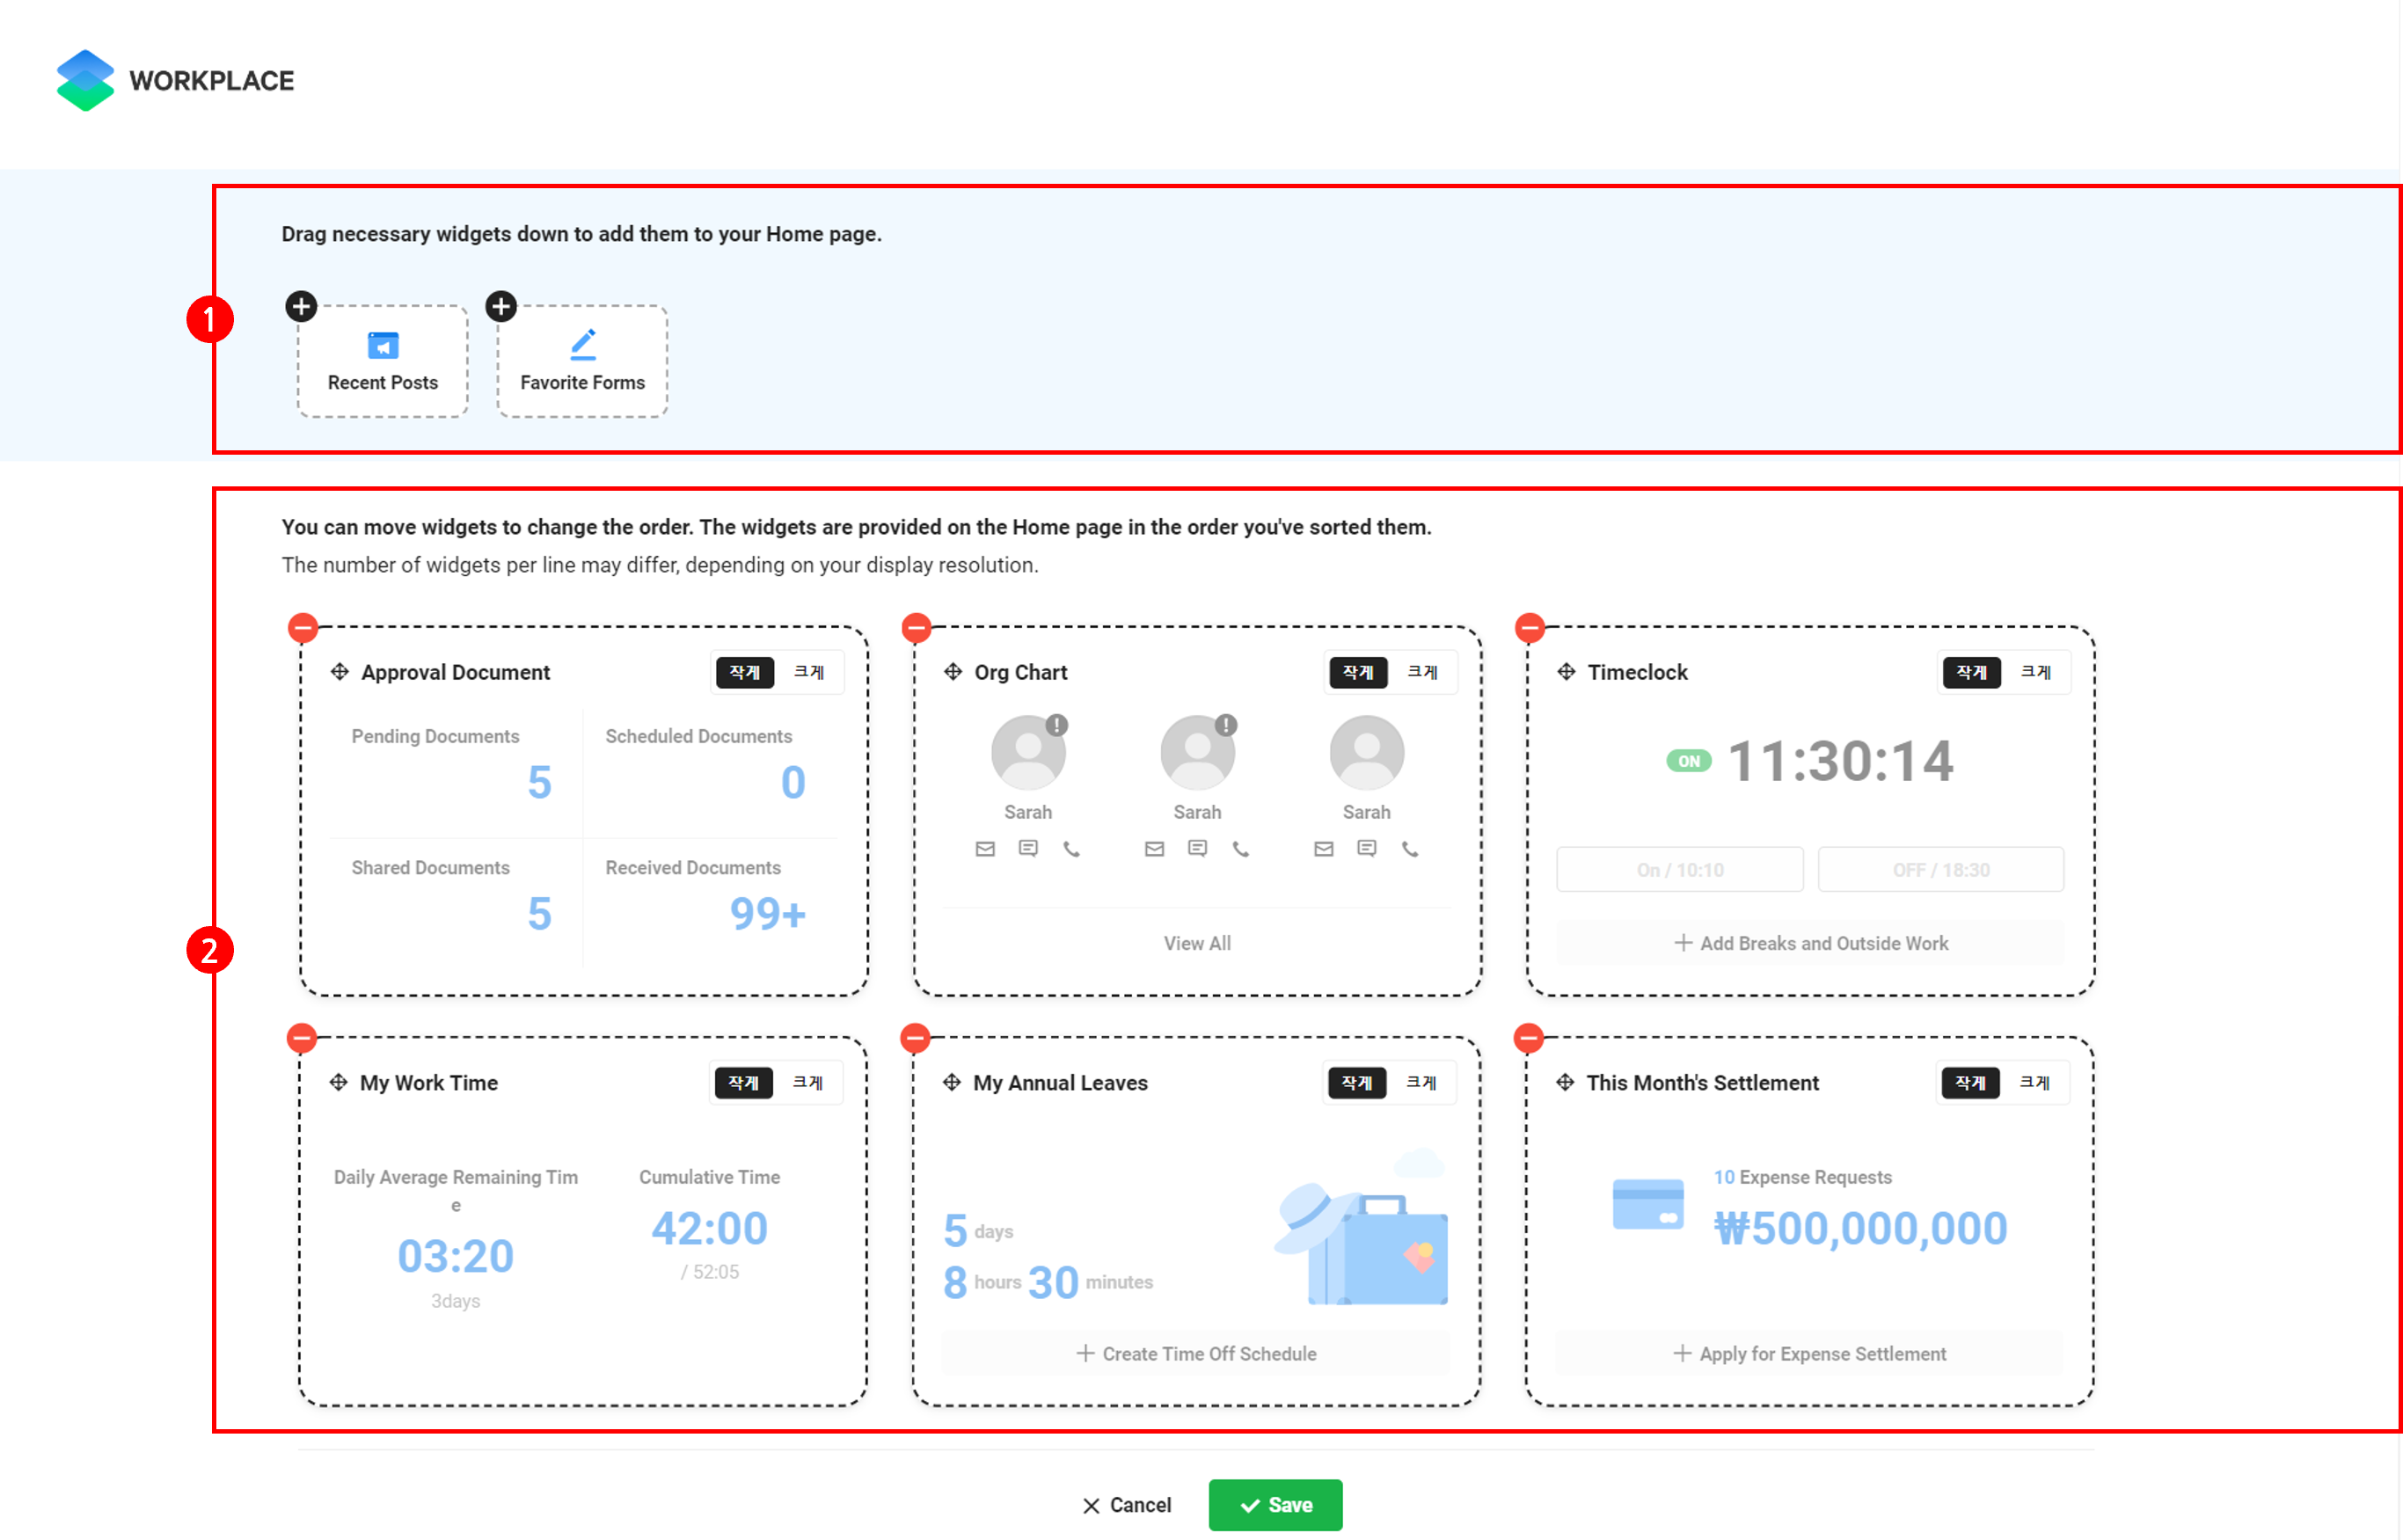
The Edit Home page is laid out as follows.
| Area | Page |
|---|---|
| Widgets you can add to Home | List of widgets you can add to Home
|
| Widgets displayed in Home | List of widgets that are displayed in Home (See Detailed Descriptions of Widgets)
|
Add Widget
The following describes how to add widgets to the Home page.
- Click ‘Edit Home’ on the PC web home screen.
- Click
 of the widget you want to add.
 - Click ‘Save’.
- Added widgets are reflected in Home.
Delete Widget
The following describes how to delete widgets from the Home page.
- Click ‘Edit Home’ on the PC web home screen.
- Click
 of the widget you want to delete.
- You must display at least one widget in Home.
- Click ‘Save’.
- Deleted widgets are excluded from Home.